Project Description
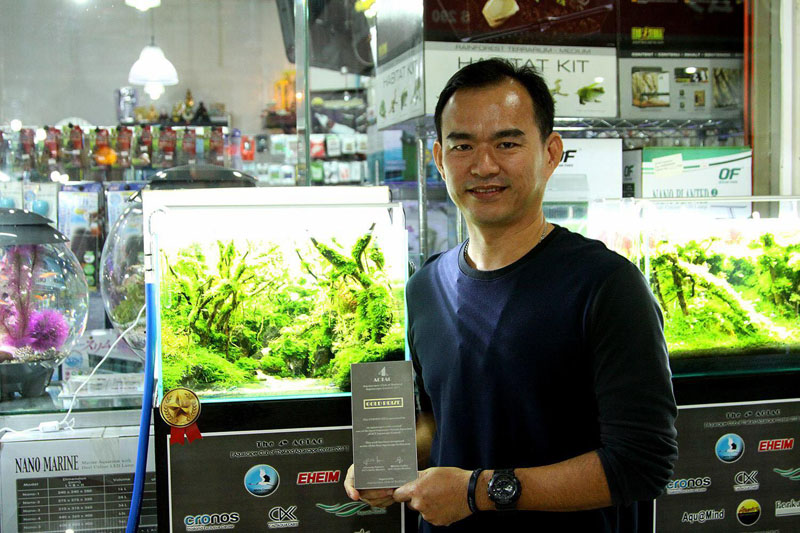
Entry #6: Eakthanut Isarathikul

I’m Eakthanut Isarathikul. I’m from the Thai province of Chaiyabhum and I am glad to be one of the contestants in this event. I will try my best. You can also follow my work on my other facebook page: Art of EAK.
The Thai version can be found here.
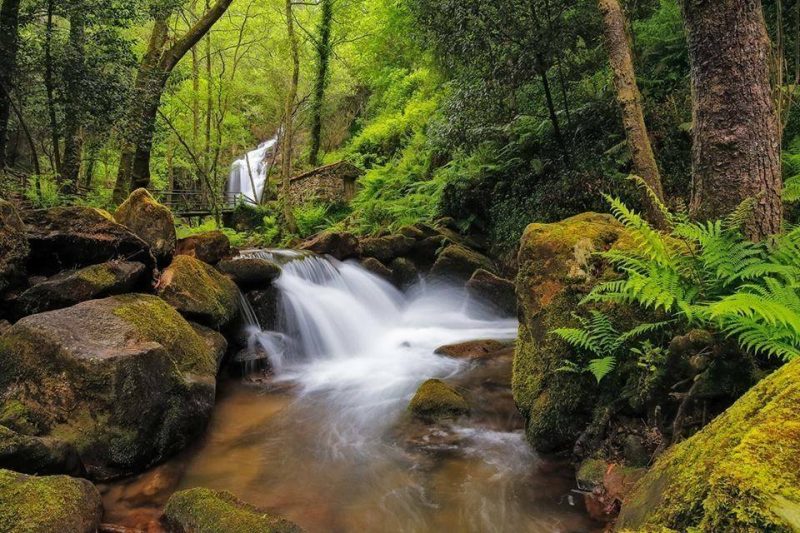
My inspiration for this competition. Because I like forest and water, I want to capture the pleasant feelings and recreate it inside a small aquarium so I can admire. This is the story behind this aquarium.
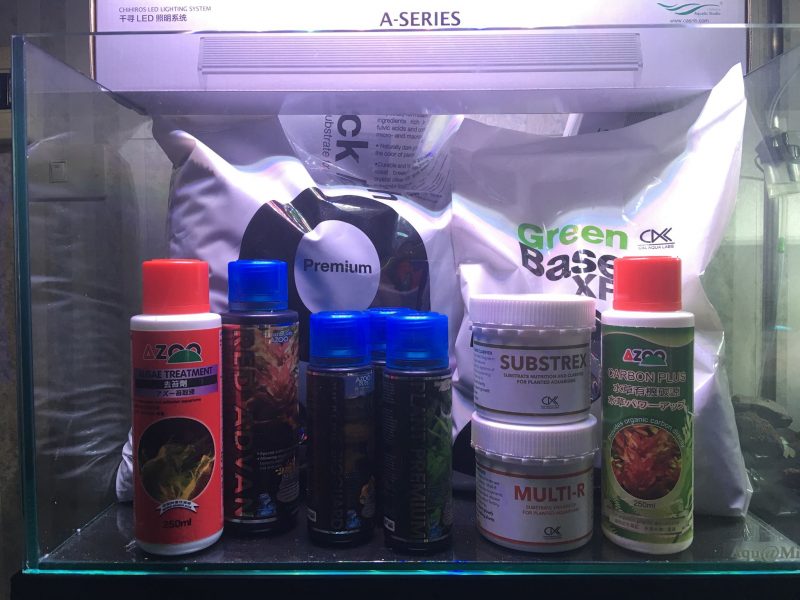
The aquarium and equipment used for this competition. A big thank you to all the generous sponsors.
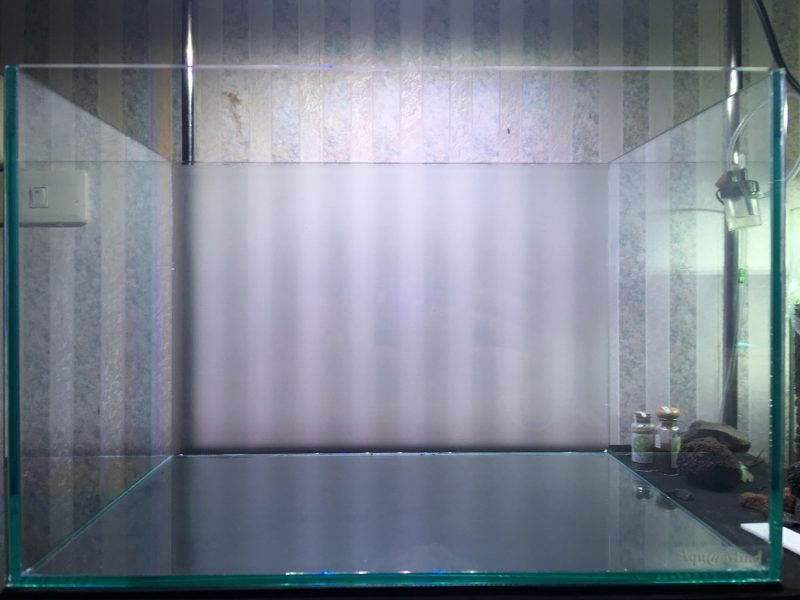
Quality tank from Aqua@mind. Not even a small bubble in the silicone or leaks to be found. I will be applying an opaque white sticker to the back. The equipment required is shown.
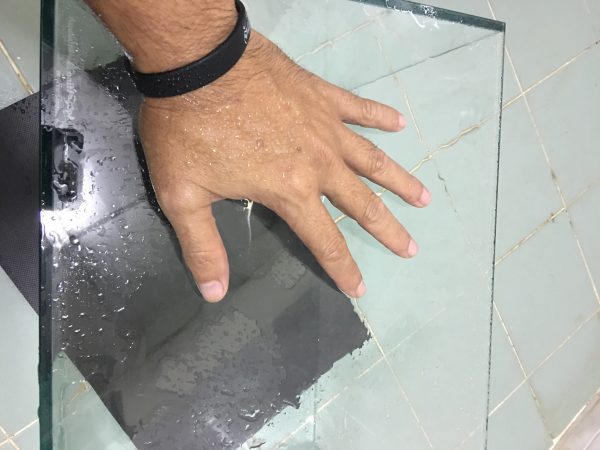
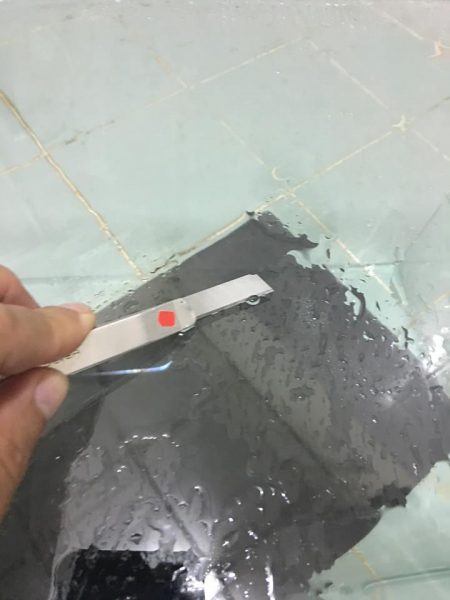
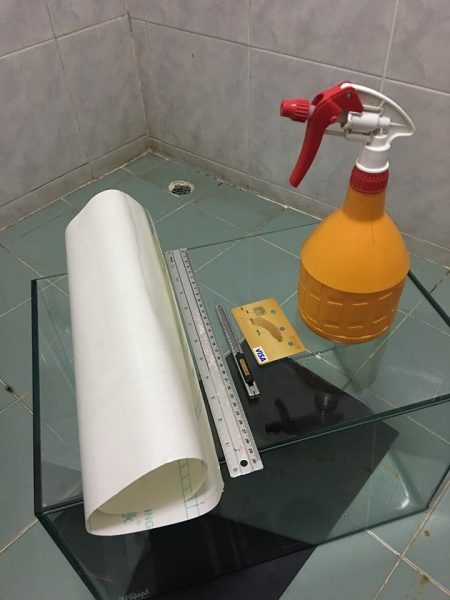
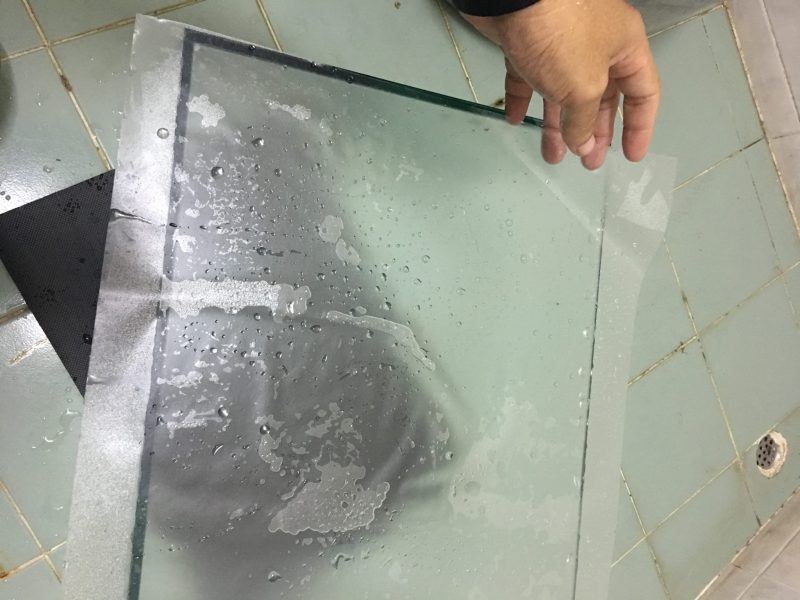
First, I spray water thoroughly over the area to be covered with the sticker. Some may use diluted dishwashing liquid solution to make application easier and the background can be adjusted if not straight. I normally do this for large tanks but not this one. After spraying water on the surface, I run my fingers over the entire surface. If we can feel some dust or glue residue, then remove them with a blade. Do this for the entire area to be applied because if there are spots that remain, they will create air bubbles and prevent the sticker from uniformly covering the surface.
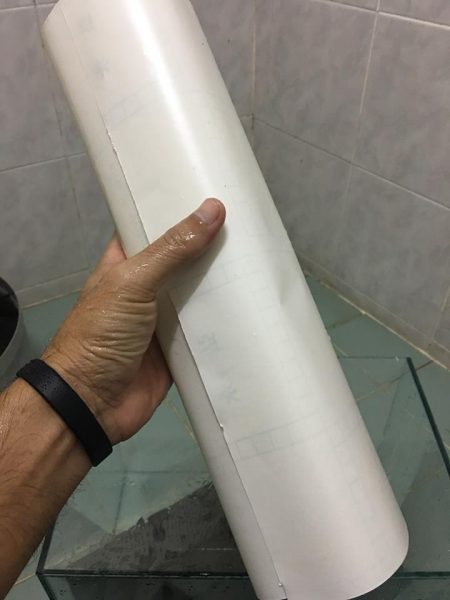
Opaque white stickers can be found at any sticker store
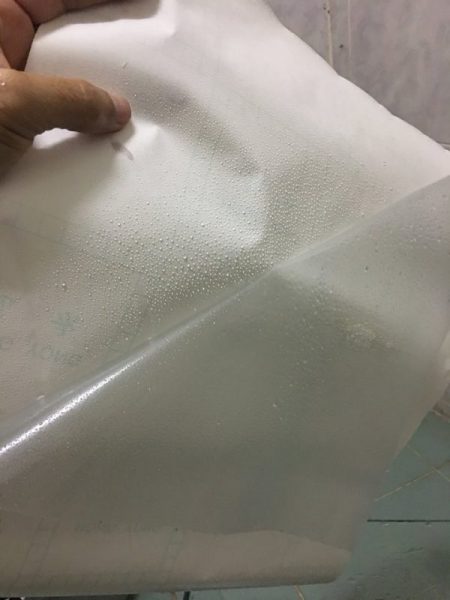
Cut the sticker slightly larger than the tank. This way it is easier to apply. When removing the backing, spray some water onto the adhesive side to prevent them from sticking together.
Before putting the sticker on, don’t forget to spray some water onto the glass. This prevents the sticker from sticking too strongly too fast and also allows us to adjust the position.
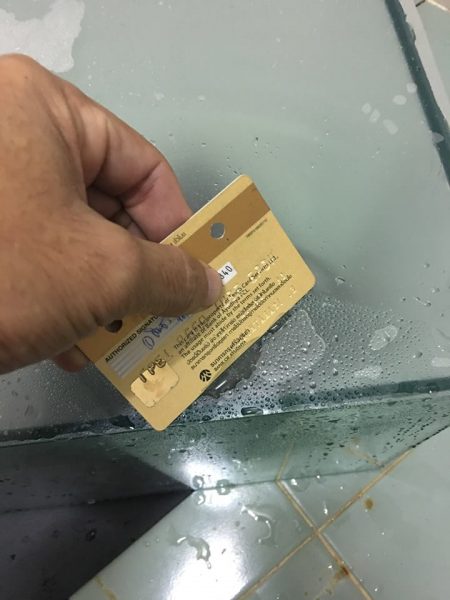
When the sticker is applied, check to make sure that there is no dust or debris on the glass. After that we use an ATM card to slowly squeeze all the water out. Do it slowly. No need to rush.
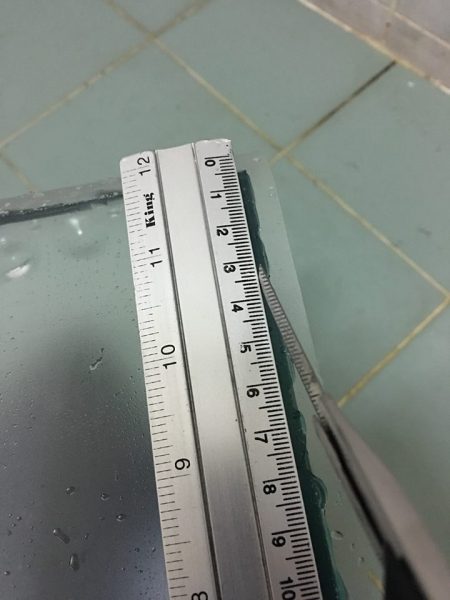
After we squeezed out all the water, we cut the excess sticker away. The trick I use is that I don’t cut right on the tank edge but rather slightly inside the edge of the tank. This is because when we lift or clean the tank, our hands don’t peel the sticker edges. Cut the sticker such that the border lies 2-3 mm inside the tank edges. Do this for all 4 edges.
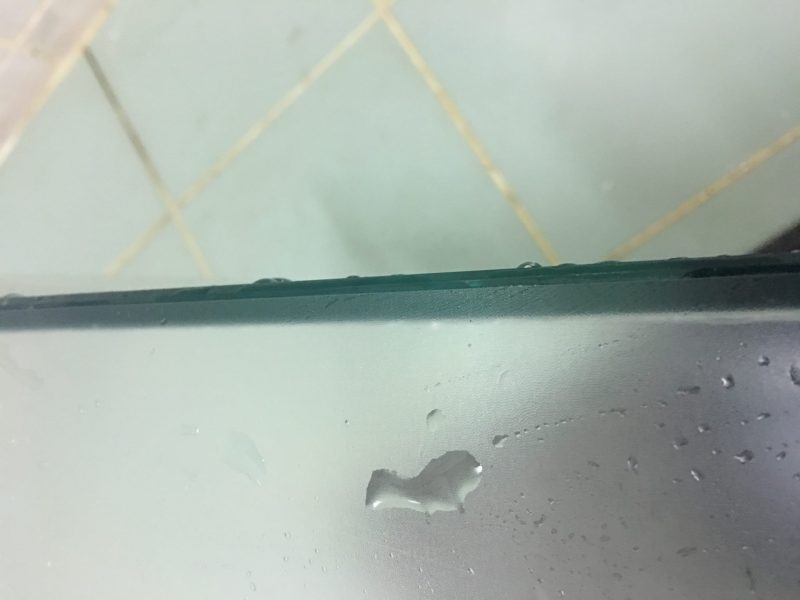
Done. Beautiful!
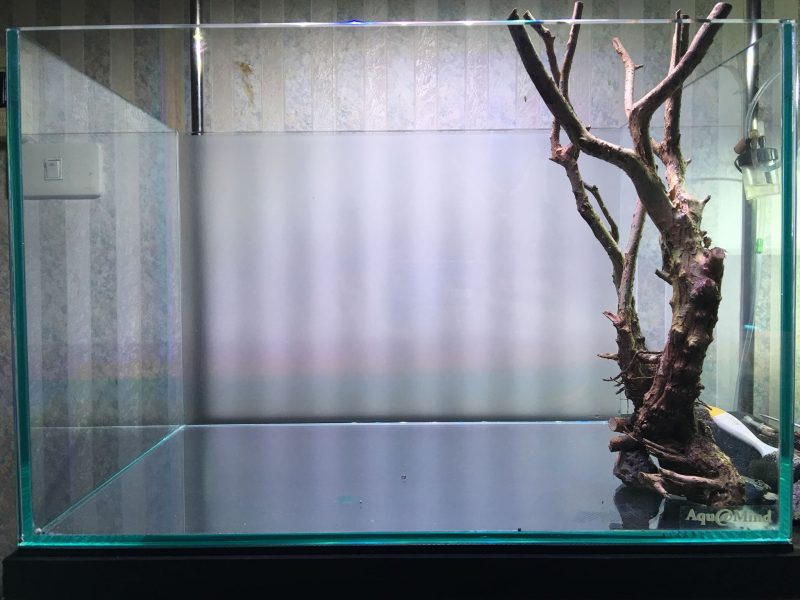
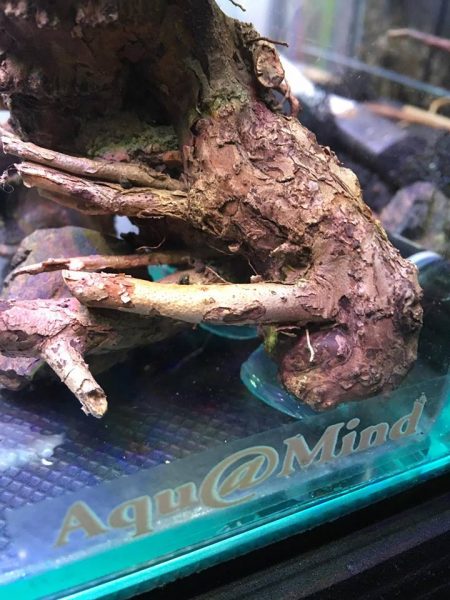
Testing with the first driftwood to see if it goes well with the tank size.

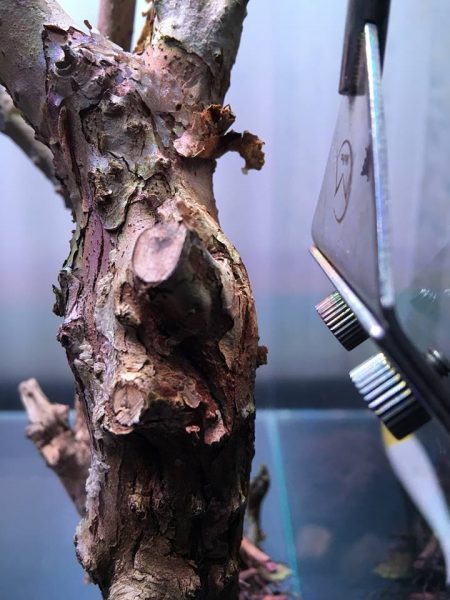
The first step is always important. When I decided to use this driftwood, I also consider maintenance issues as well. I wanted to know if I place the driftwood here, will I be able to scrape the glass? An easy way to find out is just to test with an algae scraper.
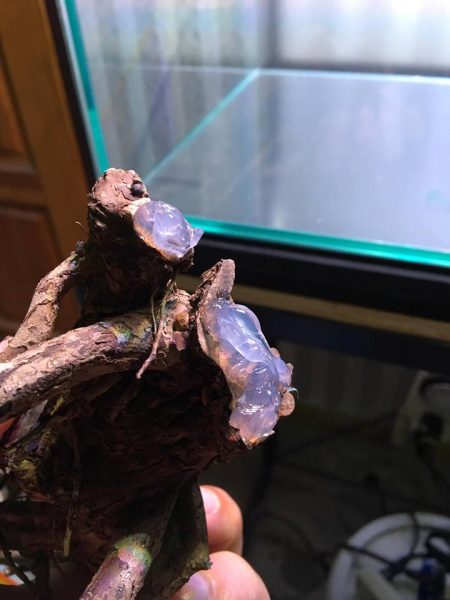
Once we find the location for the driftwood, I usually attach the wood and rocks to the tank. This is because I live about 300 kilometers from the competition site and the roads aren’t very good. So it is better to be safe and prevent the wood and rocks from moving.
I just use regular aquarium silicone. Attach them on and no more worries.

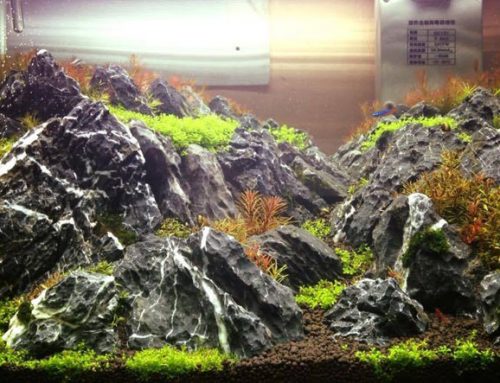
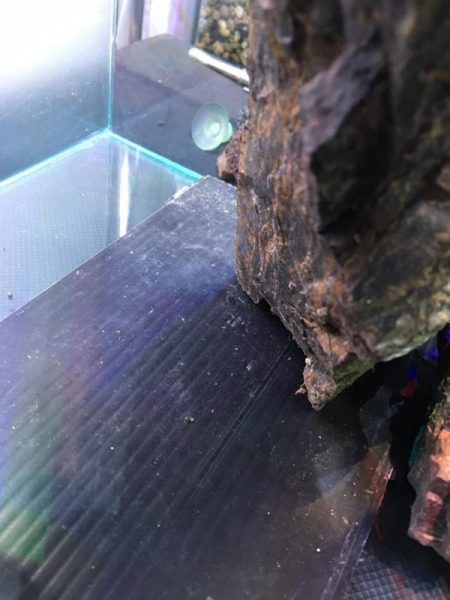
Testing the rock layout. If the rocks are large, you should lay something on the glass to prevent the rocks from impacting the glass during transportation.
Placing the rocks in the front part of the tank.

Once the rocks are in the desired position, I hold them down with silicone similar to the wood.
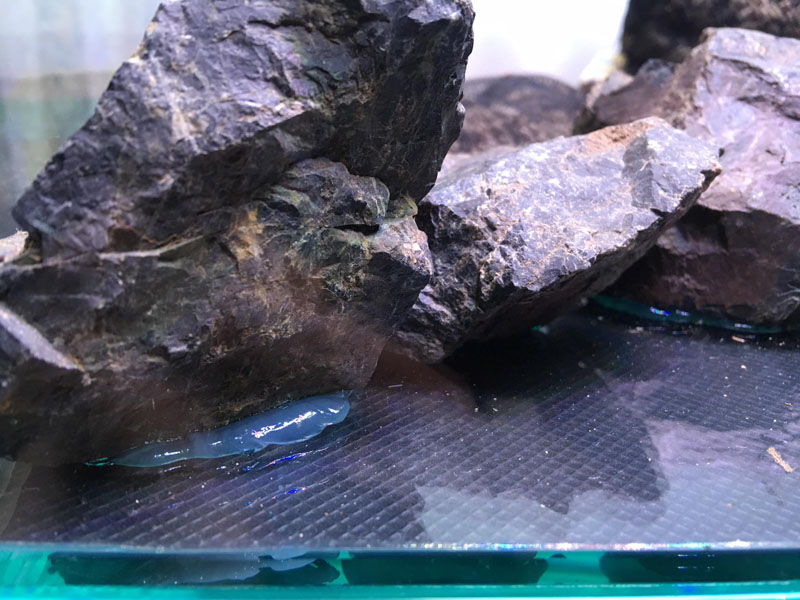
Secured them with silicone. Feels good, worry-free, and no movement. Also, they will not impact the glass below for sure.
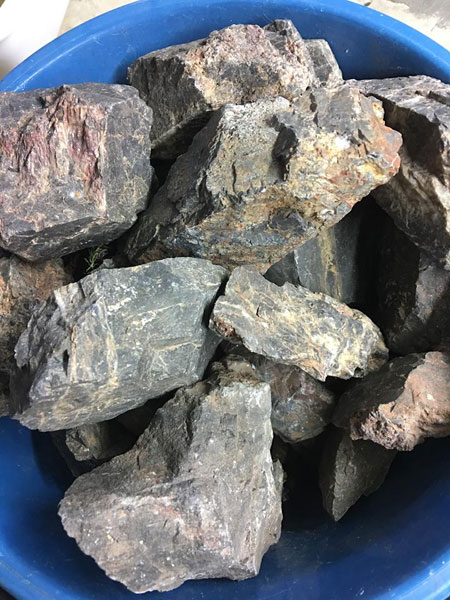
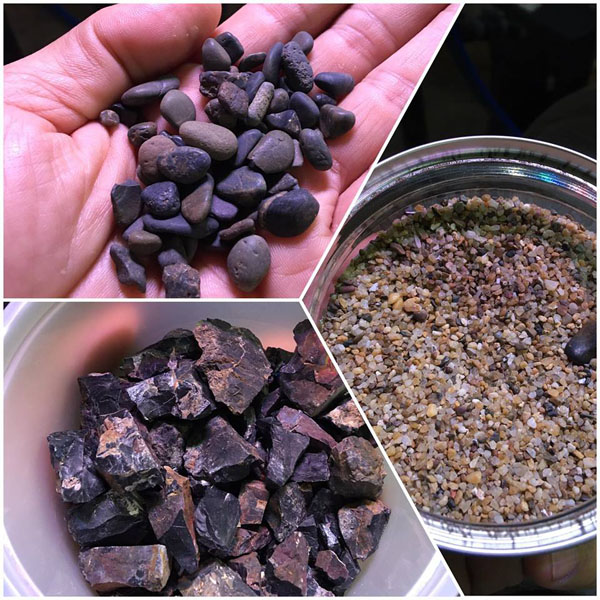
Many people liked to ask me what kind of rocks I used. It’s “grandma’s rocks” because I took it from my grandmother’s house. I have no idea what the actual name is…. ha ha ha
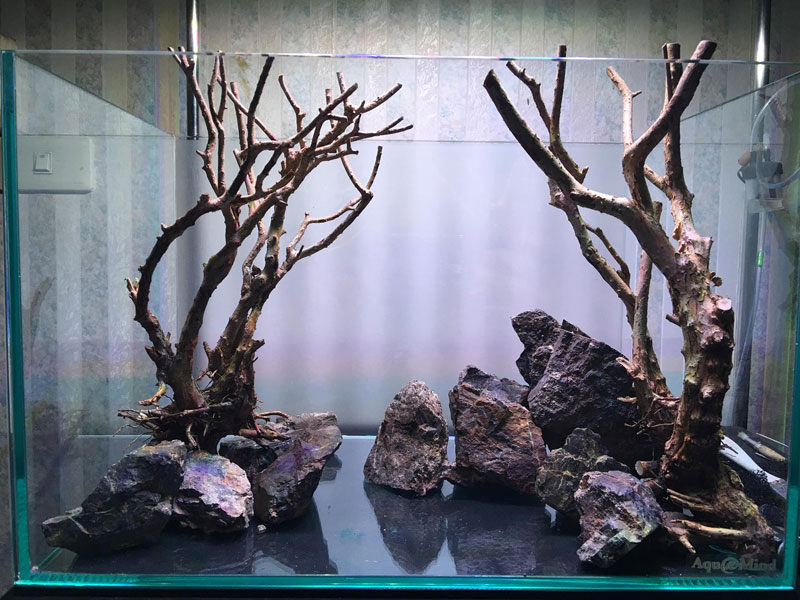
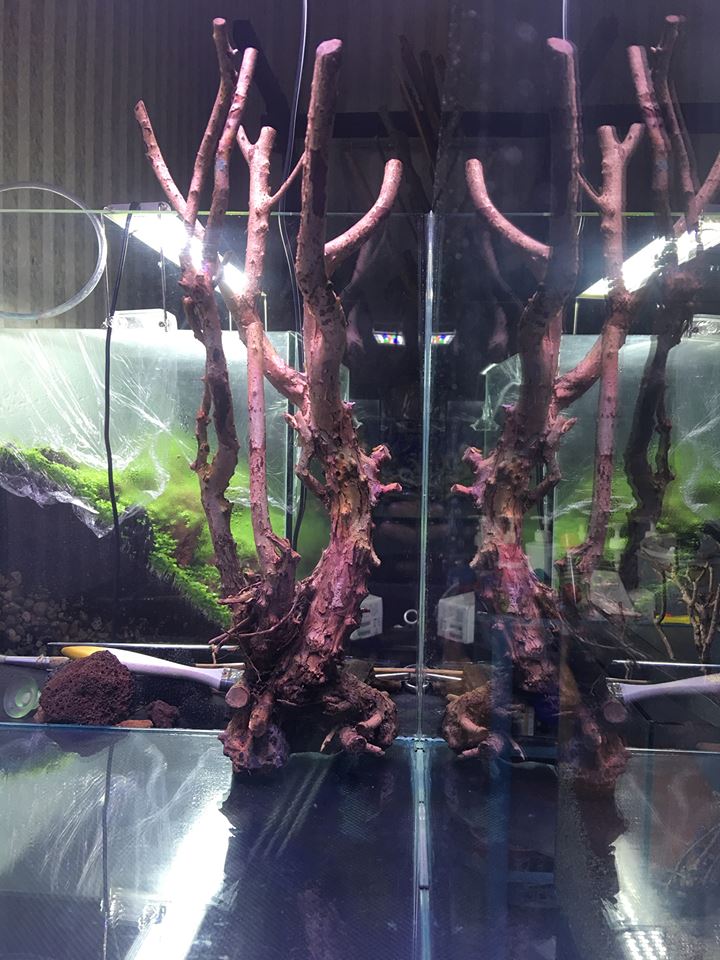
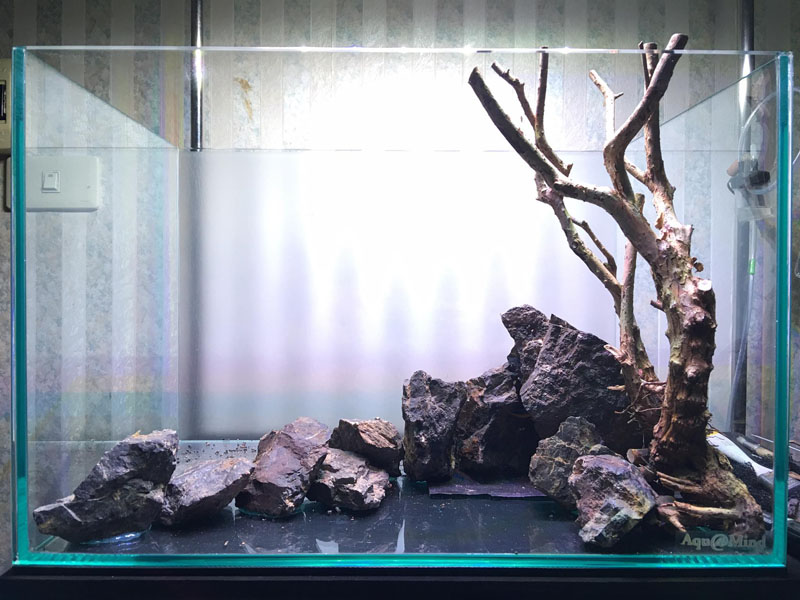
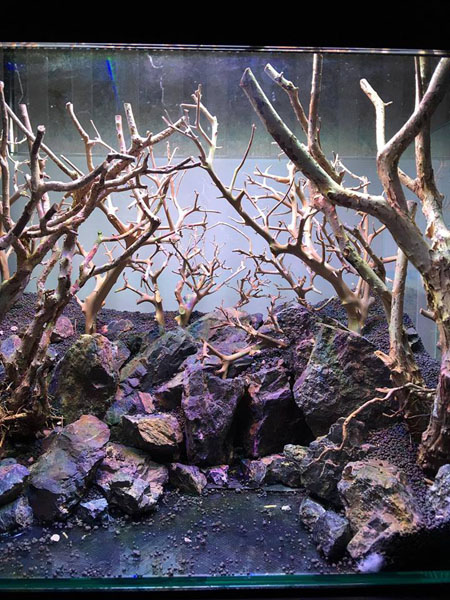
I tried placing wood on the left to see if it goes well with the layout. It is placed slightly towards the back because they are of different sizes. This helps with the perspective of the tank.
Once I am done placing the wood on the left, then I assembled the rocks as outlined earlier.
Starting to lay down the substrate additives
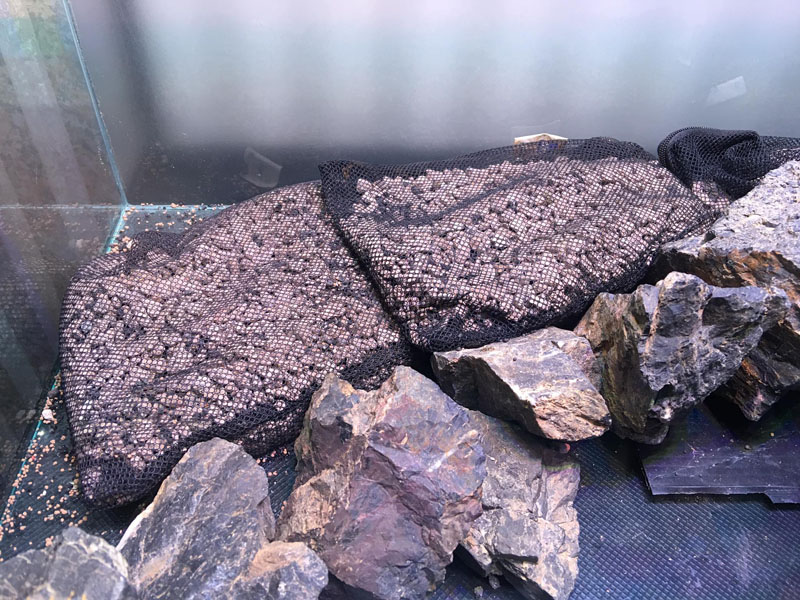
I put the base substrate into mesh bags
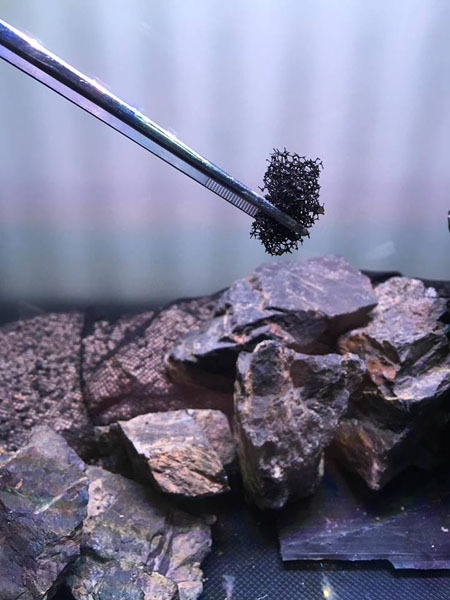
Before pouring down the soil, I insert black filter sponge between the rock crevices to prevent the soil from spilling out.
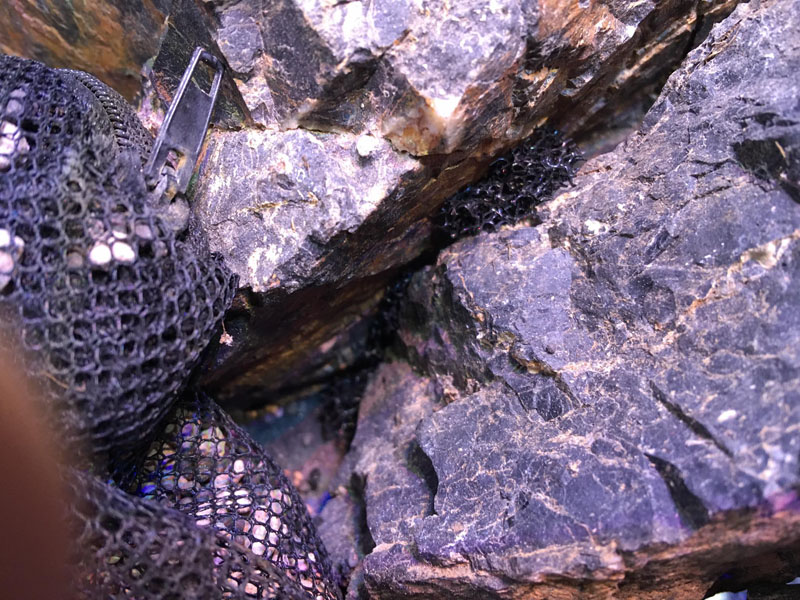
I also place them in between rocks.
Some are shoved in, some are just inserted.
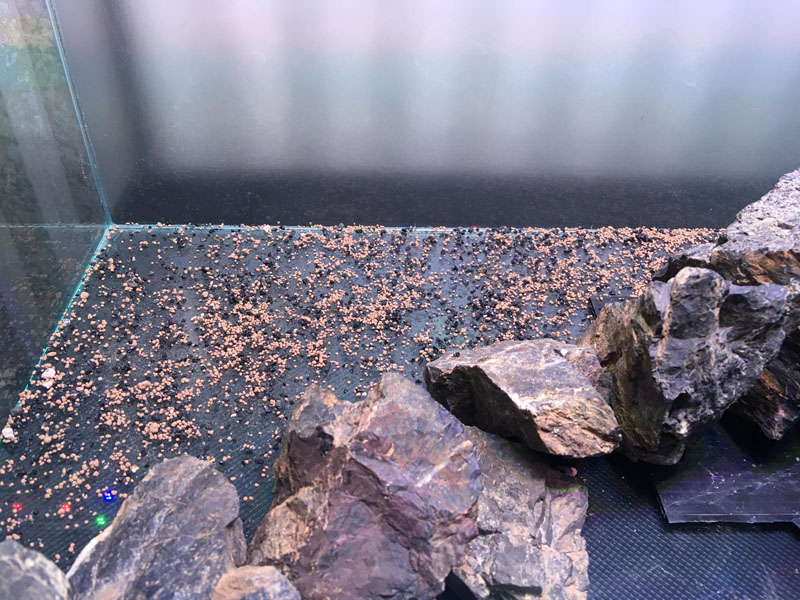
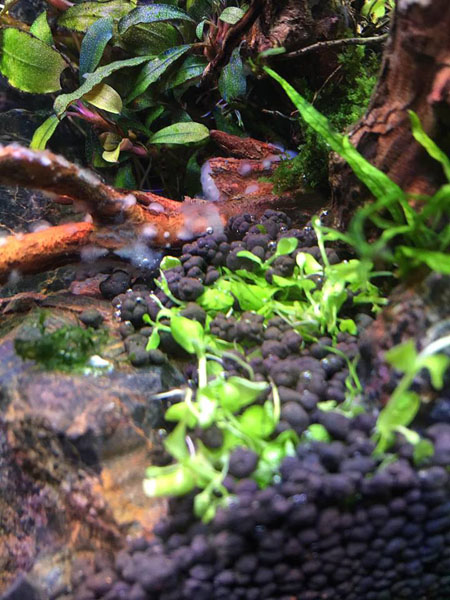
After I’m done, then it is time to put the soil in. The white dots that you see are the base substrate granules. I happened to spill some and it got mixed up a little.
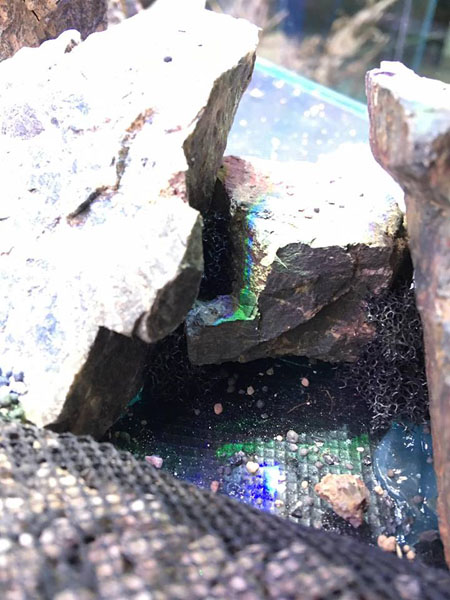
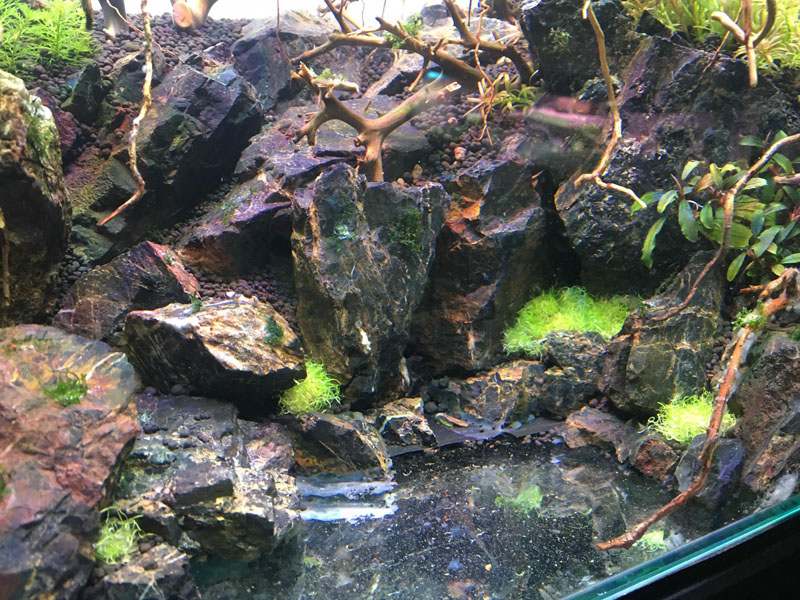
Pour the soil such that the back is higher than the front. At the same time, arrange the rocks according to our vision. For me, I’m going to have a waterway streaming down from the far back.
This is the waterway that I planned.

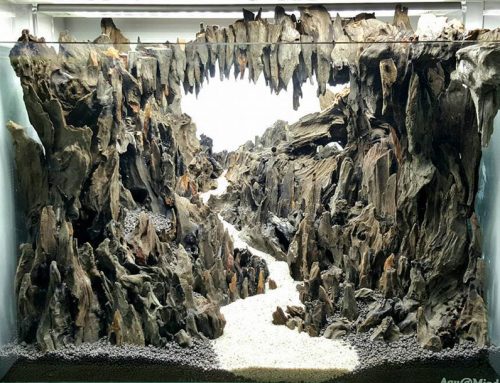
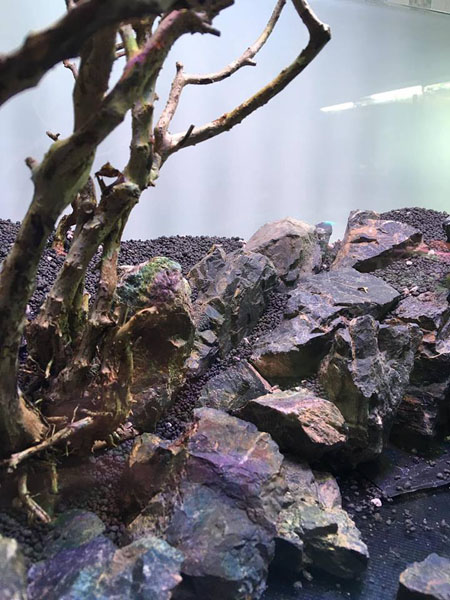
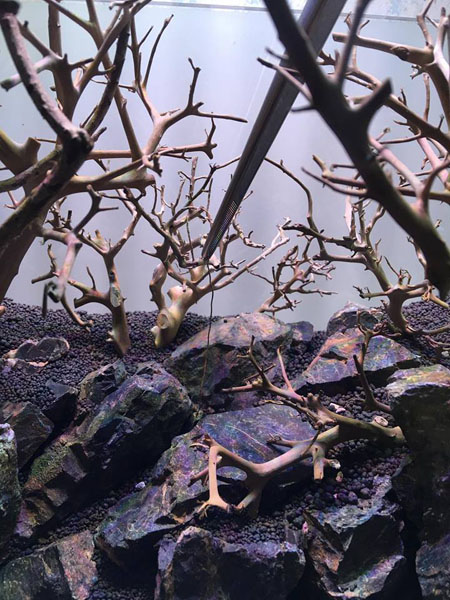
After pouring the soil up to the level that I wanted, then it is time to begin placing wood in the back.
I chose to put smaller pieces at the back so it seems like they are further away.
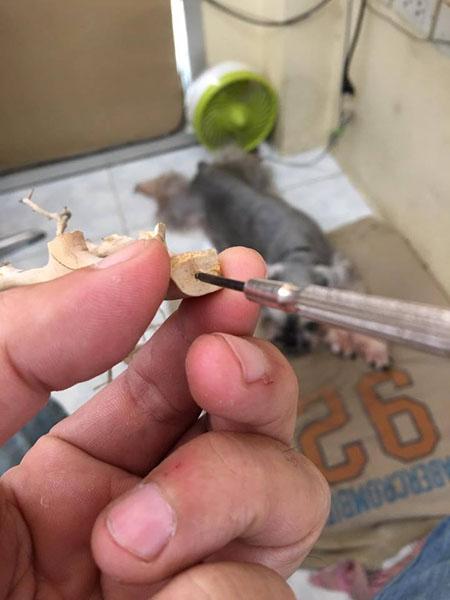
Here’s a technique to secure small pieces of wood. If the piece is short, I will extend it by first drilling a hole at the bottom.
Then insert a piece of meatball stick (made of bamboo).
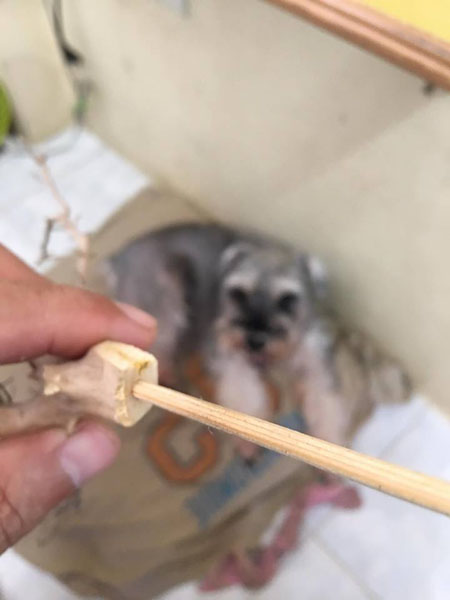
Followed by epoxy glue.
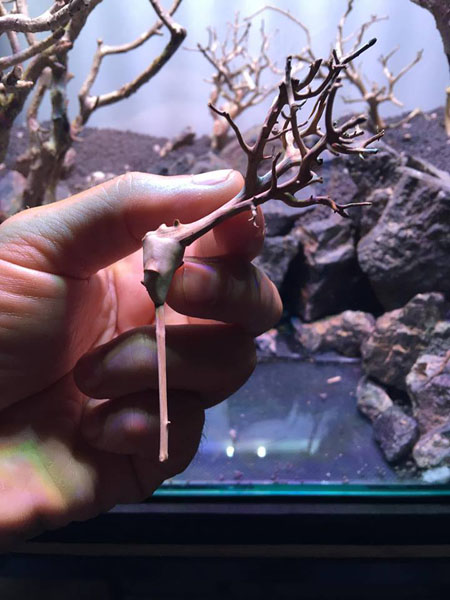
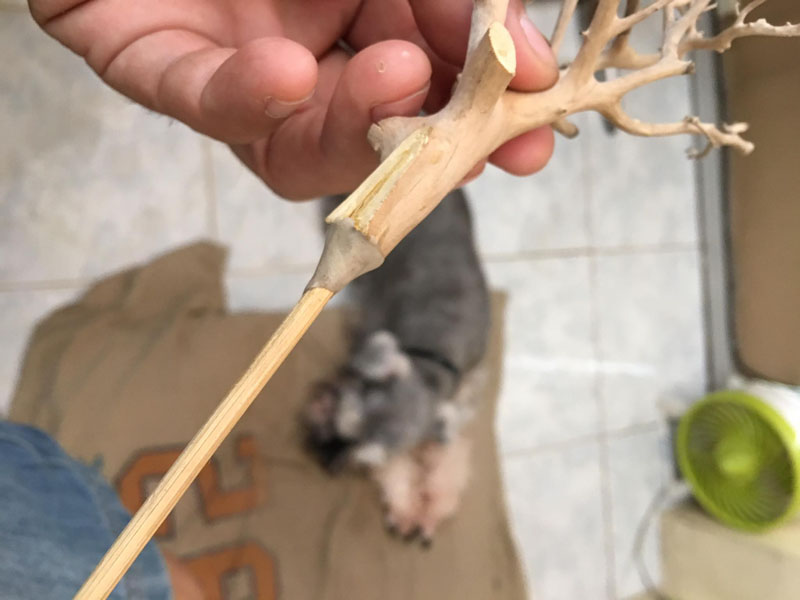
If you want certain pieces to be slanted, you can do it this way.
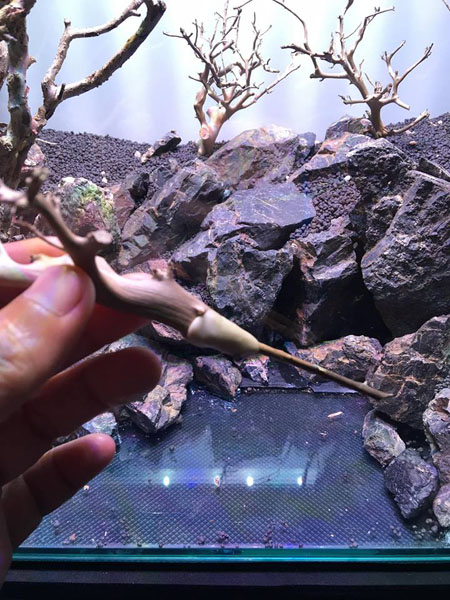
This is pretty much what the finished piece looks like.
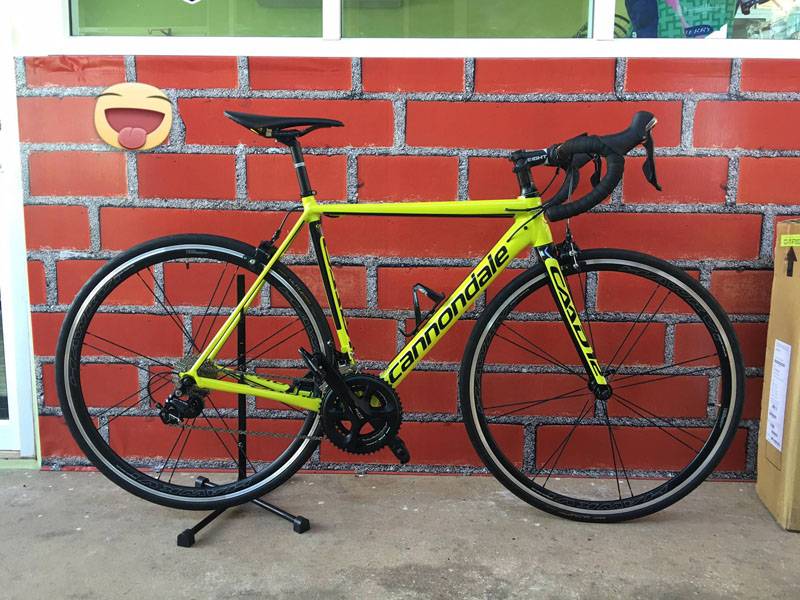
After working on the layout for a while, sometimes you might feel stressed and stumped. I recommend going out for a bike ride, get some fresh air, look at the view, mountains, then come back to your layout.
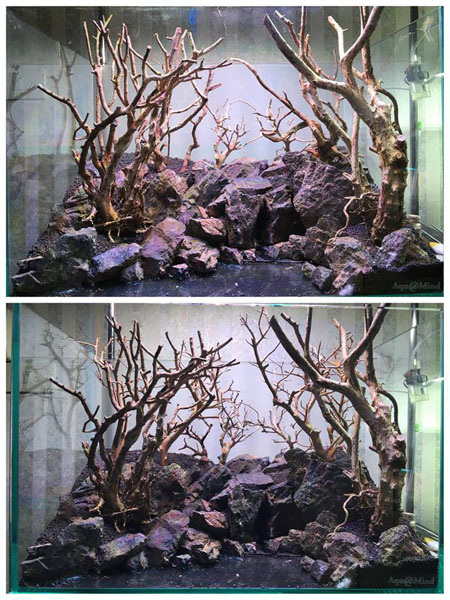
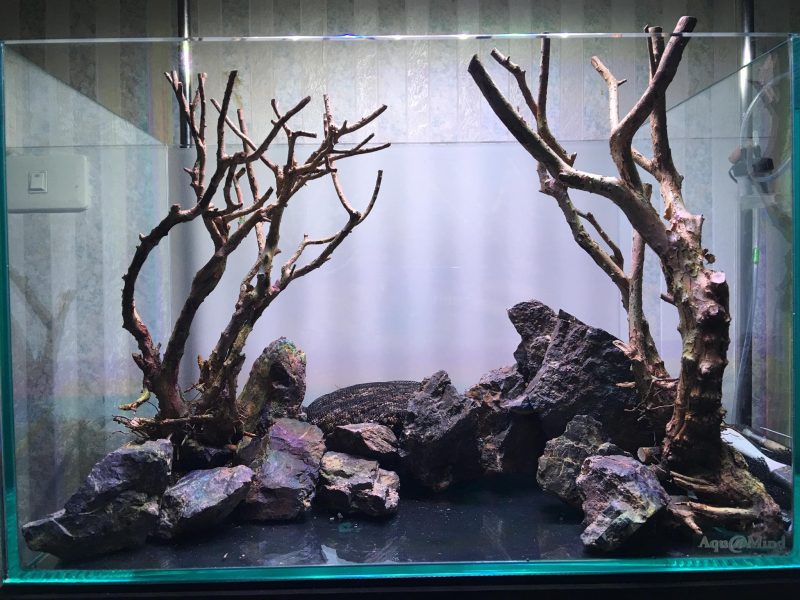
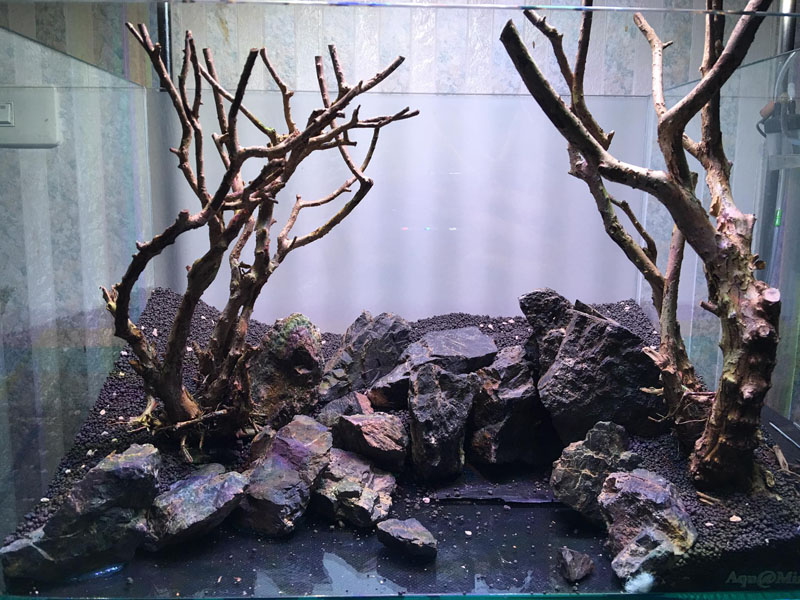
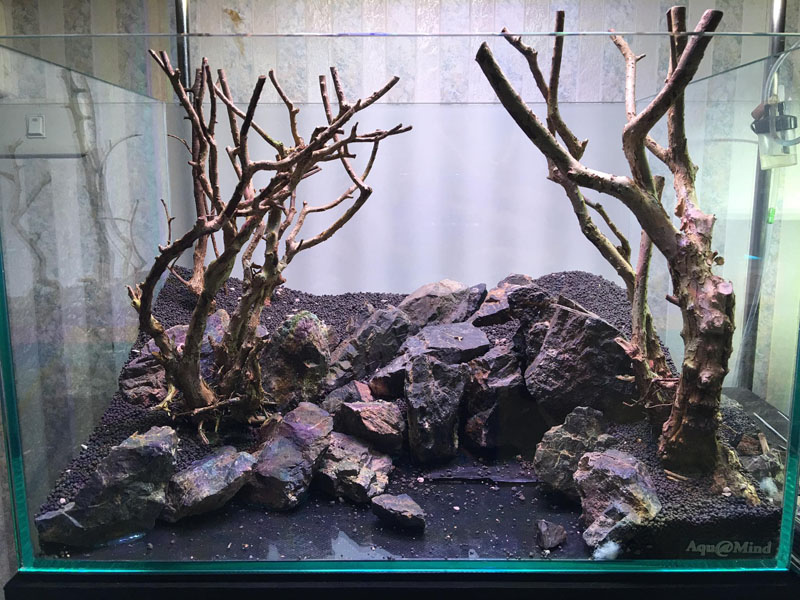
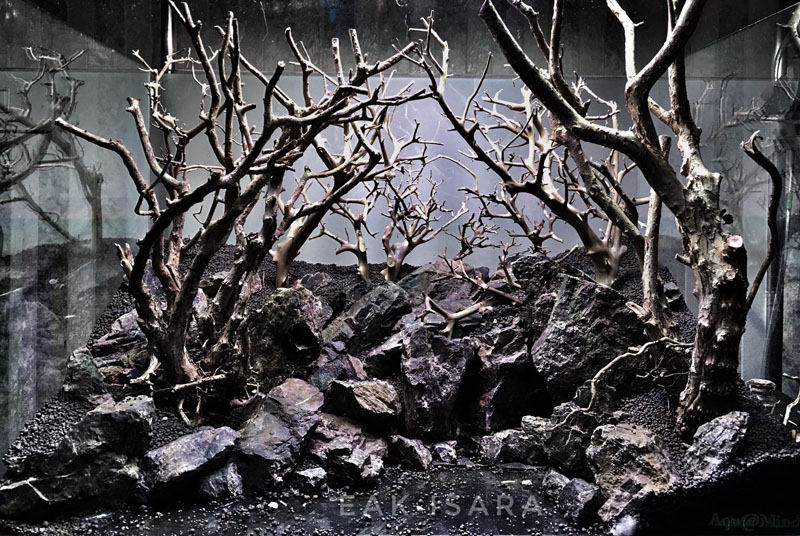
After returning from a bike ride, it is time to complete the layout. After you think your layout is completed and you are happy with it, don’t do anything to it just yet. Leave it like that and look at it for about 2 more days. I guarantee you that you will find something that you want to change. This is what happened to me. Can you see the difference?
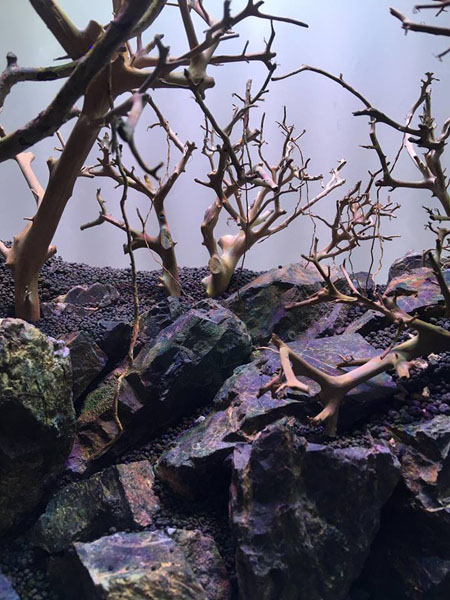
I added 2 more trees….I think that is enough.. ha ha ha. The tree in on the middle rock appears like it has fallen on the ground. As for the small tree in the back, I put it there to fill the space. I chose a smaller piece to enhance the perspective and make it appear further while tilting it helps with the viewing angle.
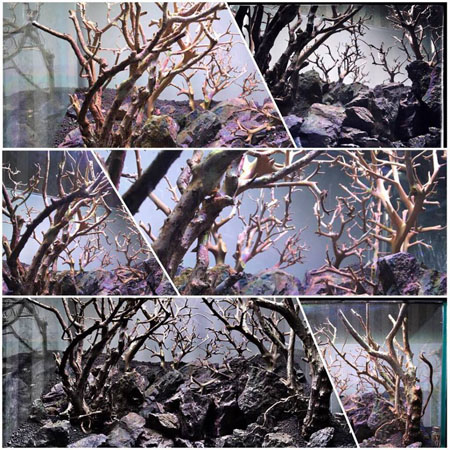
Take pictures from various angles because if we only view from one angle, sometimes we will not spot any visual flaws. I like to look at the layout from various angles and make sure they all blend it at every point.
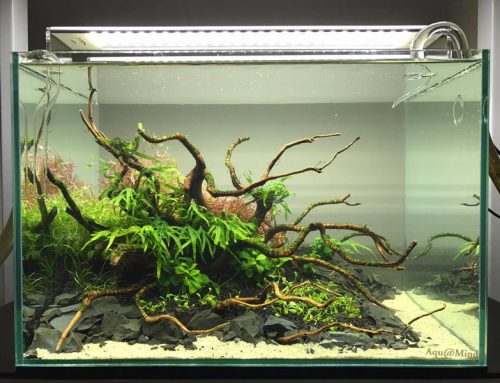
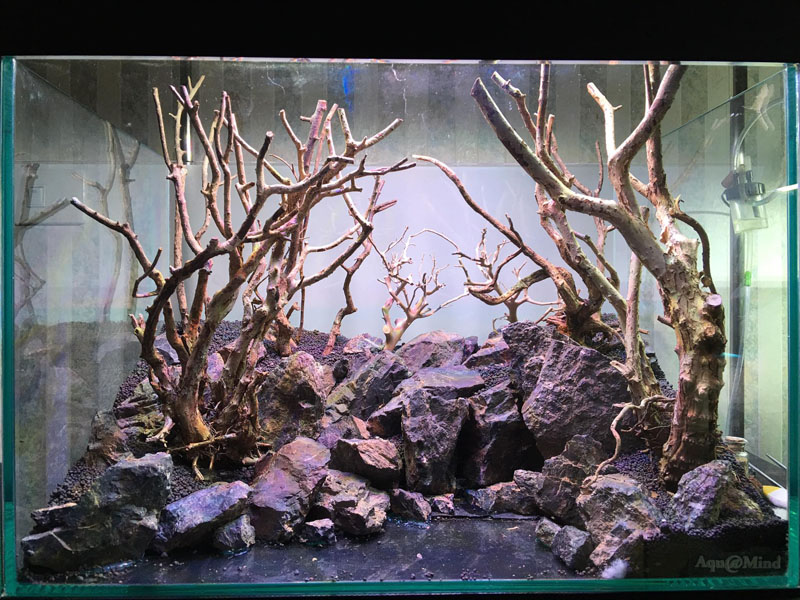
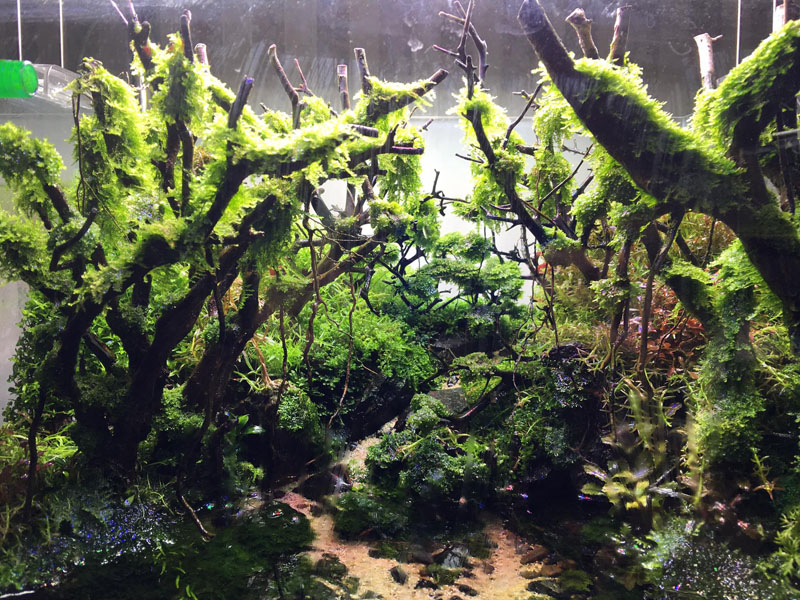
The basic layout is completed. Next we will deal with the details and further add nature to it. Stay tuned.
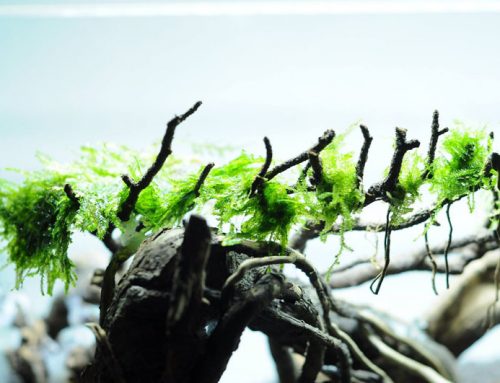
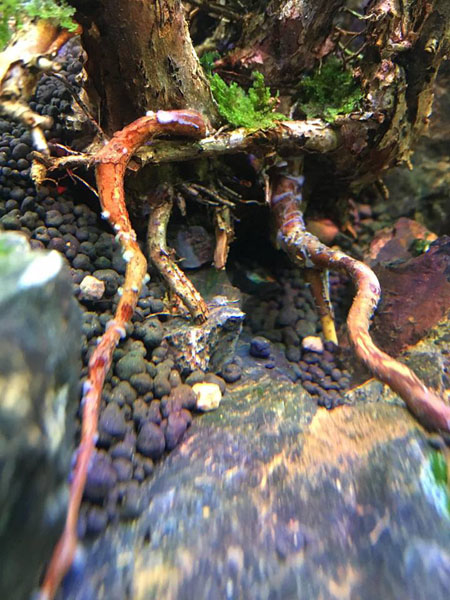
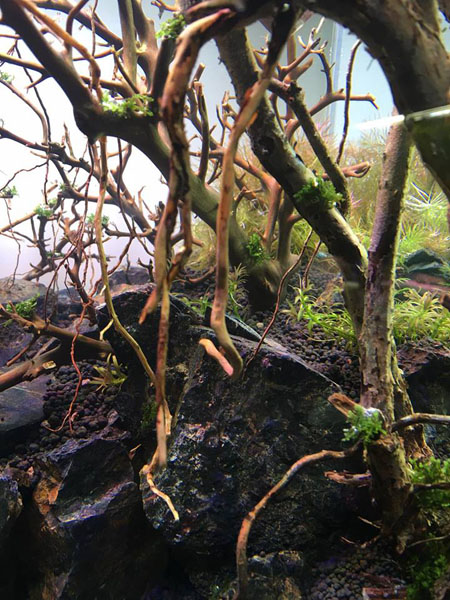
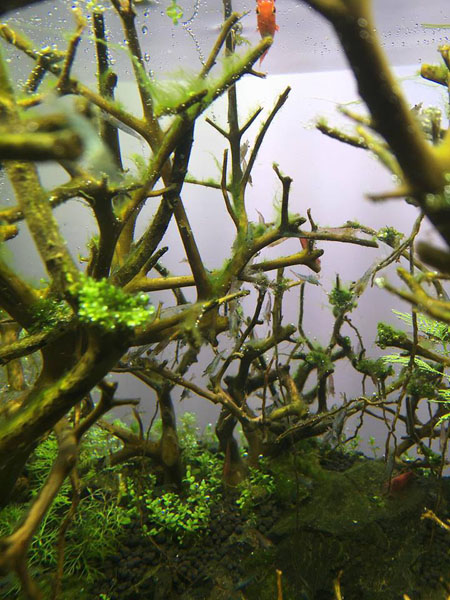
Today we will be adding fine details to make the branches look natural. I use small strands of roots to make little vines hanging from the branches. I place smaller strands further back, and larger strands closer to the front. This pictures shows a small strand being glued to a tree that is placed further back.
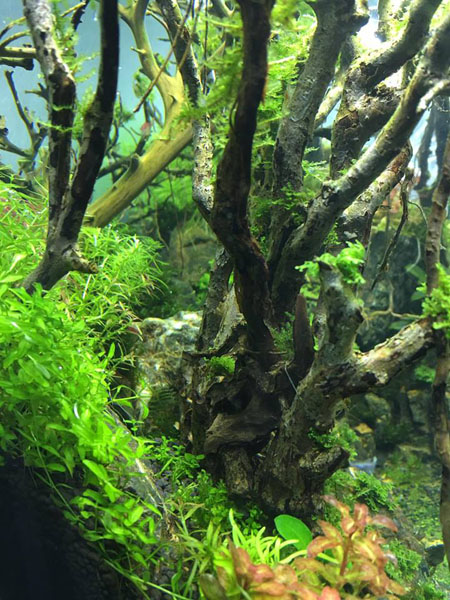
For trees that are closer, I used a larger root strand.

For the tree that is right in front, I used a large root strand.
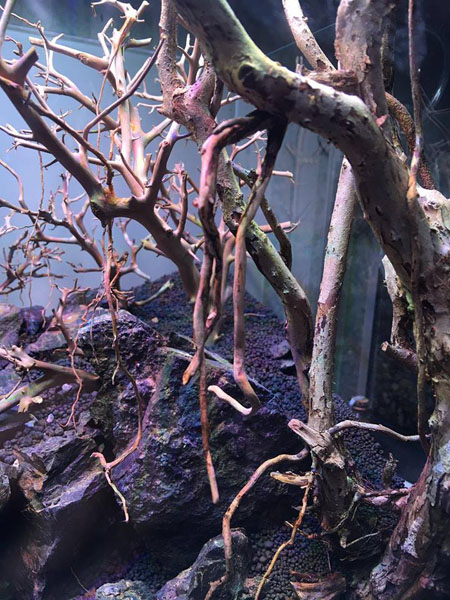
The front strands are clearly larger than those at the back.

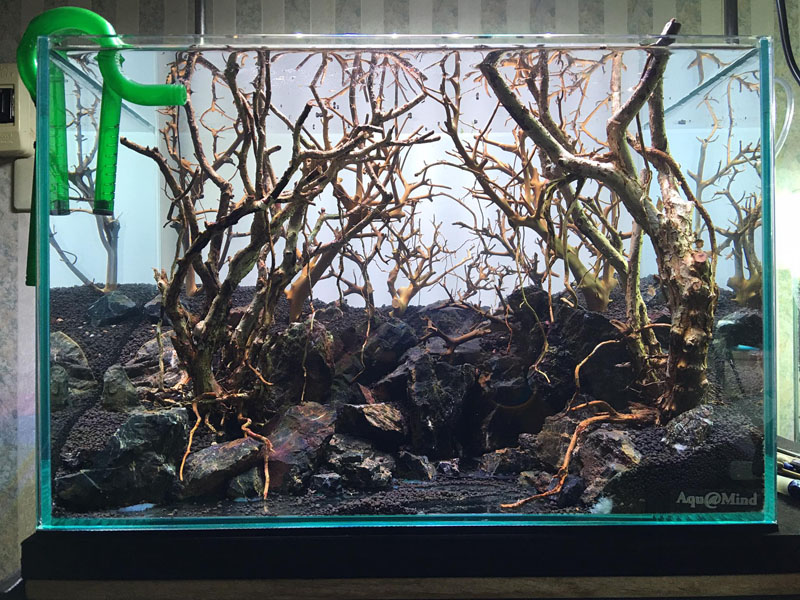
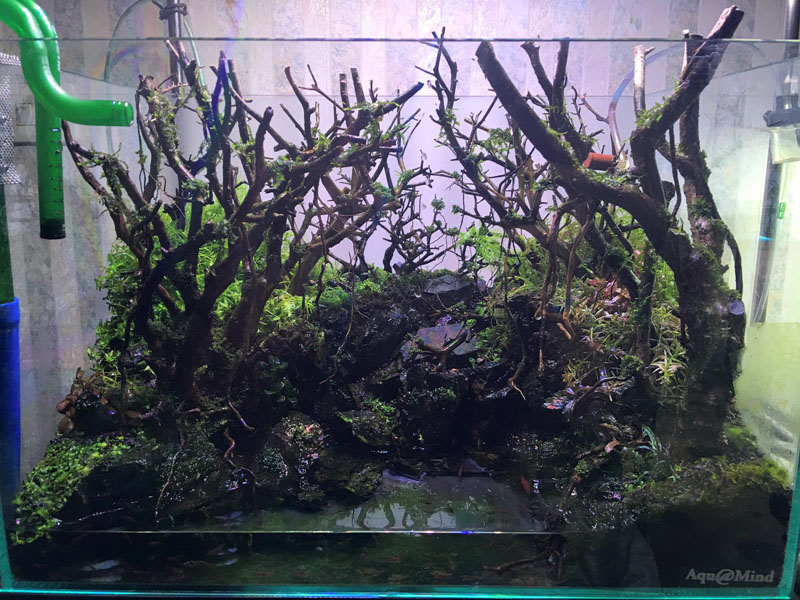
An overall view.
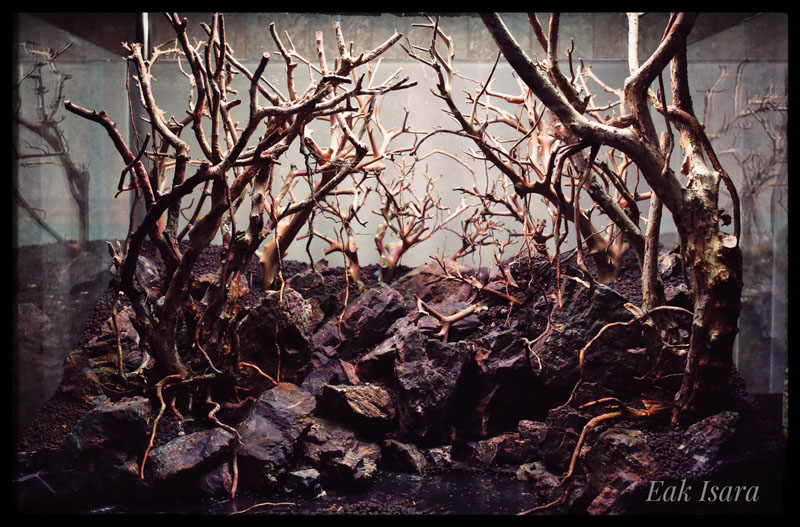
Lay Out Complete !!! For me, the woodwork is finished. I intentionally left the front space empty since I like to put sand in later on when the tank is close to its peak form. I used to put sand in right at the beginning and by the time the tank is mature, there were lots of green algae on the sand and I ended up having to remove the sand anyway. So from then on, I put the sand in towards the end and create a stream at the same time. After this, we will start with planting. Please stay tuned.
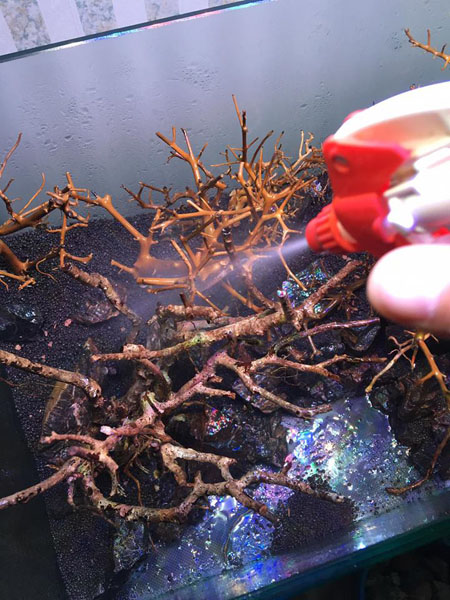
I usually fill the tank up before I begin planting. Before adding water, we have to wet the soil thoroughly otherwise some soil granules might float up when we add water. I use a foggy spray to wet the entire surface.
Spray and wet the entire surface.
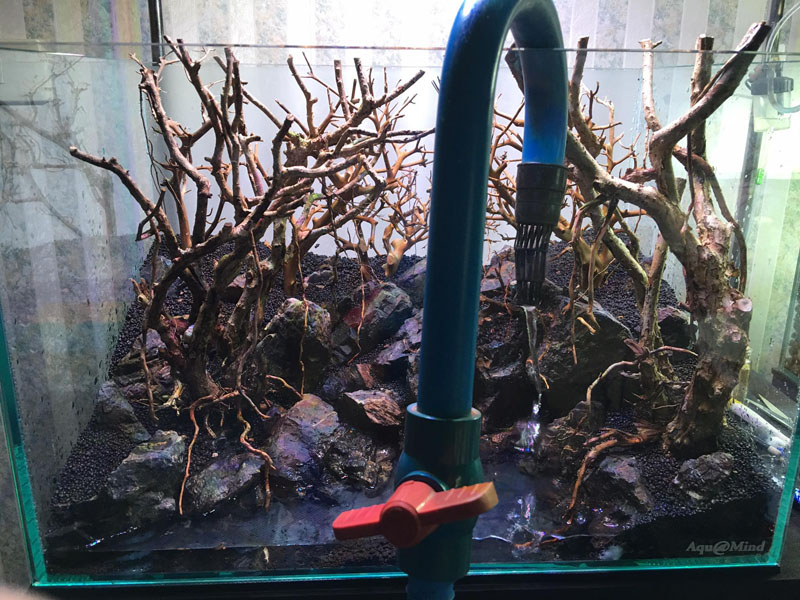
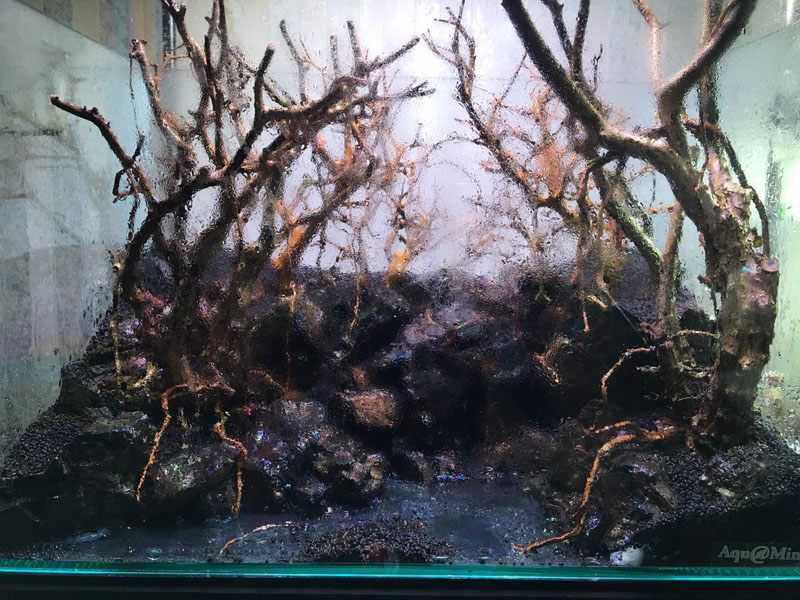
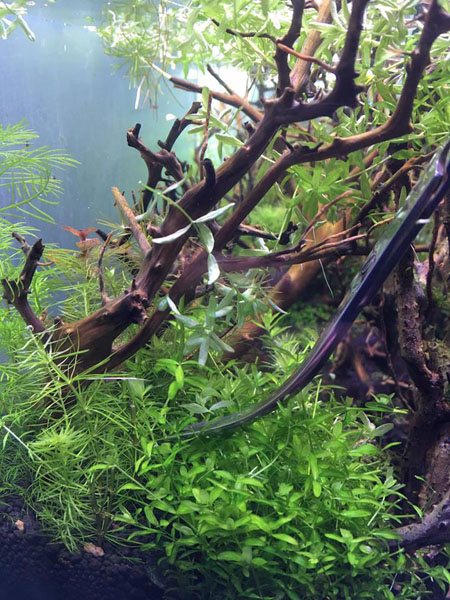
When done spraying, carefully add water. If the branches that we used for the layout is new, be careful because they might float. But the ones that I used here, I kept them underwater for a while so no need to worry. They will not float for sure.
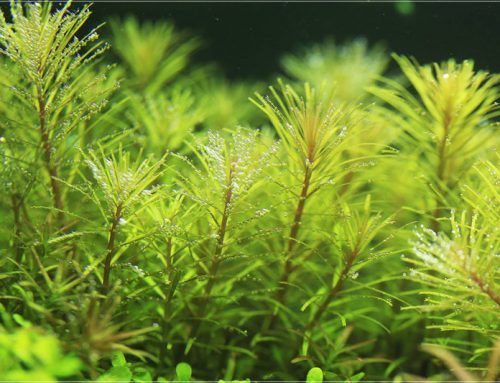
The tank is now filled. I installed the filter and left it for 1 day before planting. As for the plants that I will be using for this competition, the theme is “Rotala Revolution”. Because of this, the main focus will be stem plants. The list includes: Rotala Mexicana, Rotala sp. HRA, Rotala sp. Vietnam, Rotala sp. Wallichii, Rotala sp. Nanjenshan, Hemianthus Callitrichoides Cuba, Riccadia Graeffei, Gratiola Viscidula, Limnophila sp. “mini”, Utricularia Graminifolia, Micranthemun Umbrosum ‘Montecarlo’, Lilaeopsis Brasiliensis, Bucephalandra sp., Fissidens sp., Fissidens Fontanus, Ludwigia sp. “Guinea”, Hemianthus Micranthemoides, Anubias Barteri Var. nana “Petitle”, Microsorum sp. “Needle Leaf”, Crepidomanes Auriculatum, Myriophyllum Mattogrossense, Myriophyllum Mattogrossense “Mini”, Fontinalis sp., Vesicularia Ferriei (weeping moss), Taxiphyllum sp. (minipearl moss), Vesicularia Montagnei (christmas moss), Vesicularia Dubyana (java moss), Vesicularia sp.
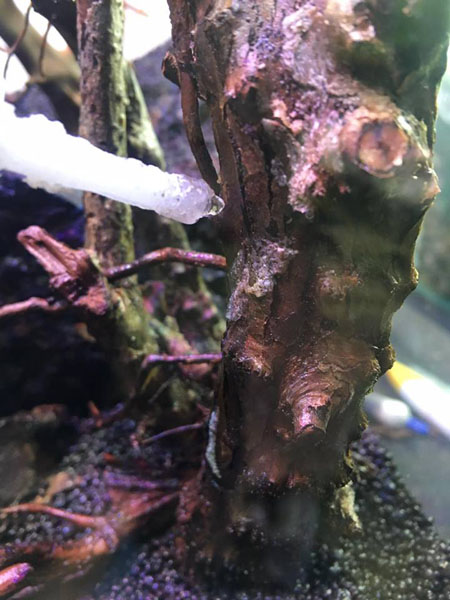
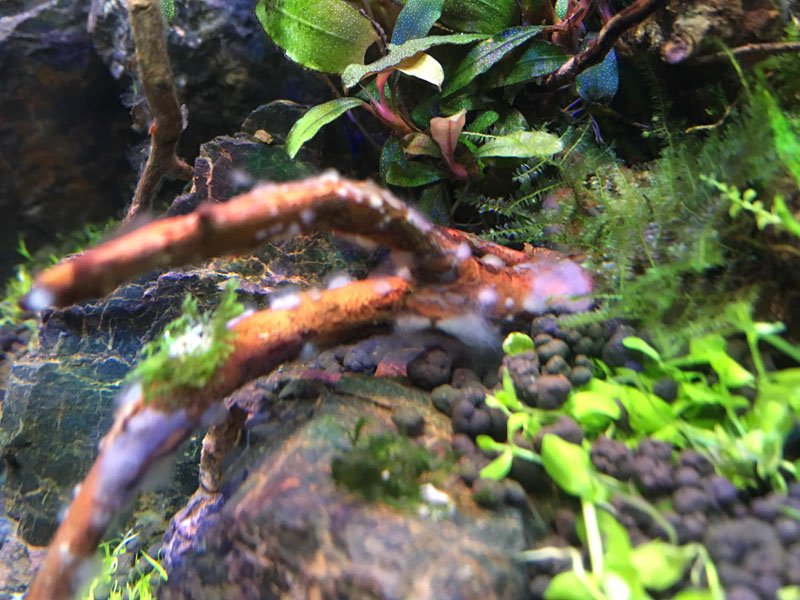
The branches start releasing slime but this is considered normal.
No need to be concern. When the plants begin to fill in, simply add a couple mollies and the slime will be eaten in no time.

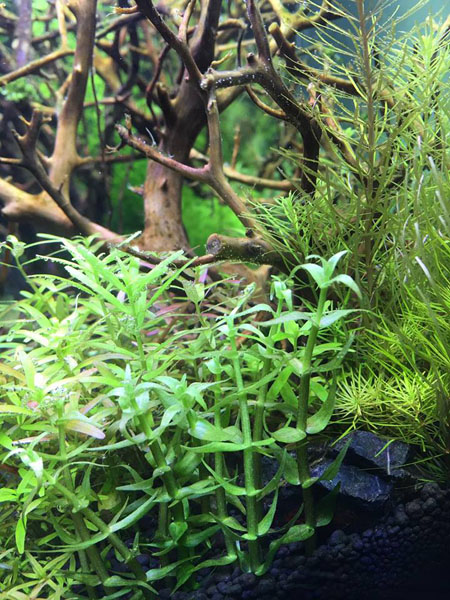
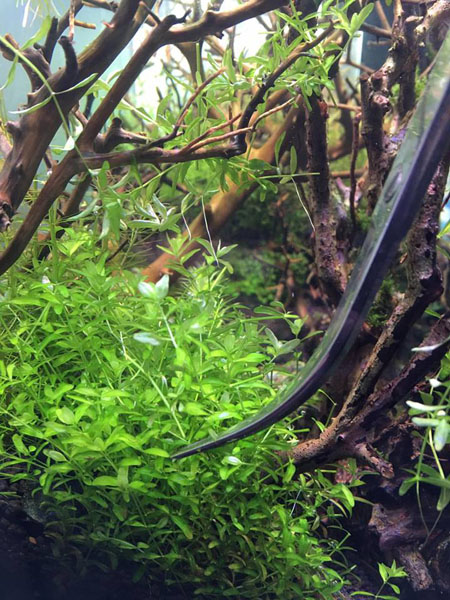
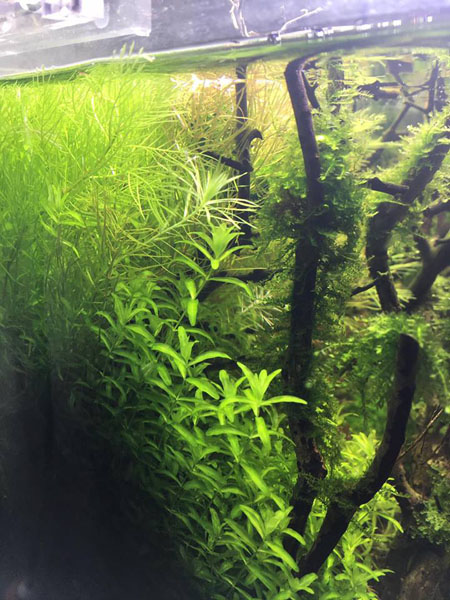
I started planting on the left side with three-leaf Hemianthus micranthemoides. In the back I use R. wallichii interspersed with R. nanjenshan and Ludwigia sp. “Guinea”. The idea is to break the vivid green of H. micranthemoides with the subtle red of R. wallichii.
As for the right side, I use R. mexicana in which I hope they will eventually cover the edges of the large stone. For the back I use R. wallichii just like on the left side.
For this tank, I planned to use U. graminifolia right from the start so I bought some tissue-cultured plants. I washed out the agar before planting.
Since the plants are so tiny and difficult to plant, I just placed them where I wanted them to be – on the left side of the tank.
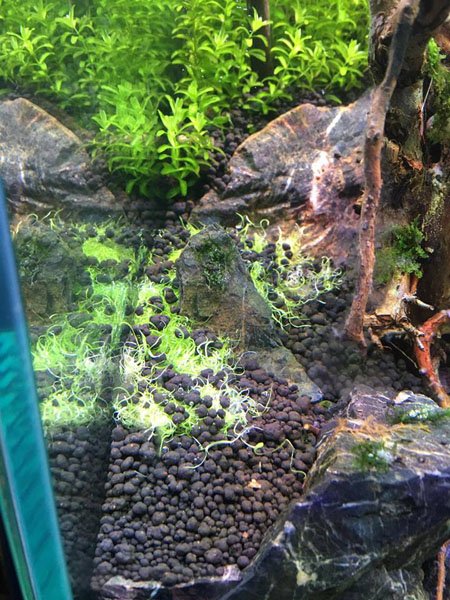
and covered lightly with some soil to prevent it from floating up.
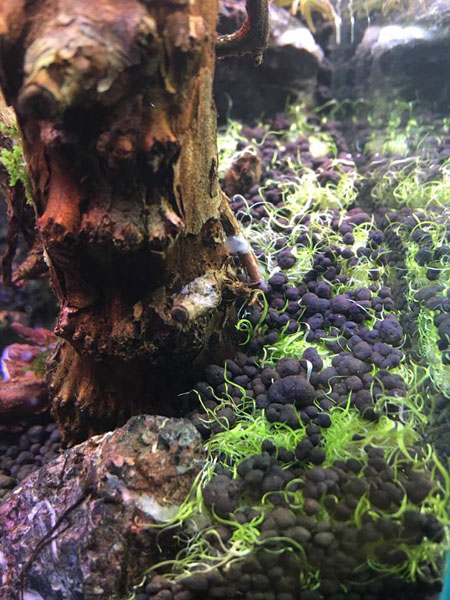
I did the same for the right side.
Divided up some U. gramminifolia and planted them in the rock crevices.
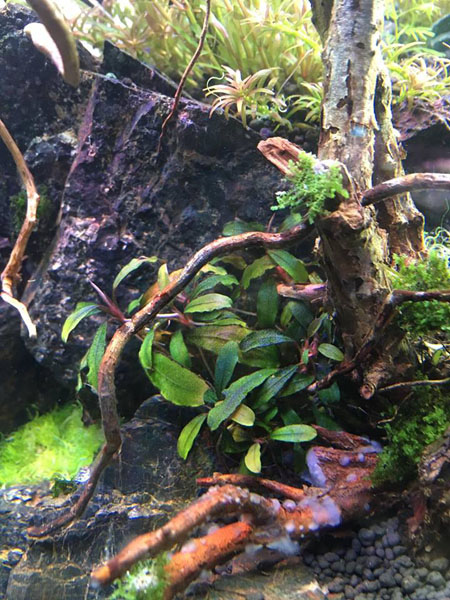
I put the entire bucephalandra patch here to help shield the main rock.

In some of the crevices I put Micranthemun umbrosum ‘Montecarlo’ in hope that once they are fully grown, they would creep down the rocks.
Micranthemun umbrosum ‘Montecarlo’ in front of the tank.
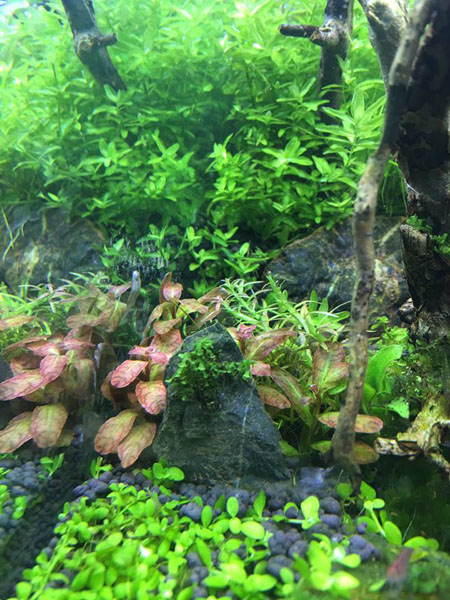
At the back left I planted some Myriophyllum mattogrossense interspersed with Ludwigia sp. “Guinea”, Hemianthus callitrichoides, and Myriophyllum mattogrossense “Mini” Cuba.
As for the right side, I planted Myriophyllum mattogrossense “Mini”, Limnophila sp. “mini”, and Micranthemun umbrosum ‘Montecarlo’.
I placed Gratiola viscidula on the right side next to Rotala sp. HRA
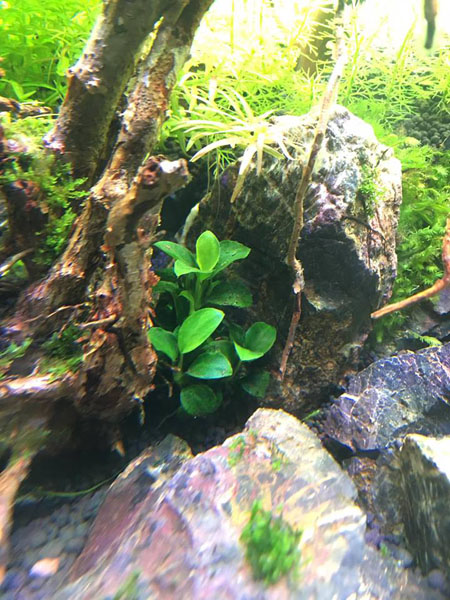
I stuffed some Anubias nana “petite” in the rock crevices.
The overall picture.
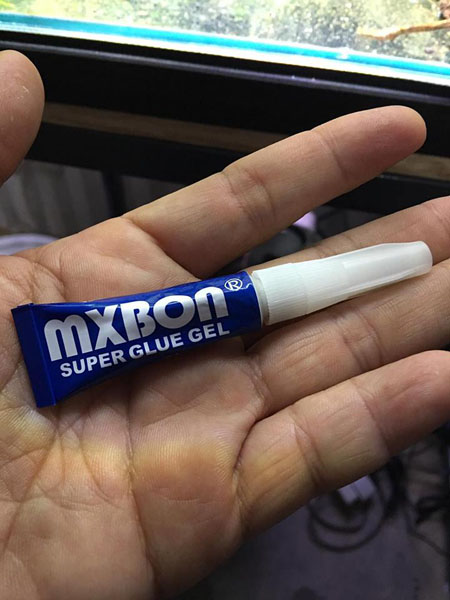
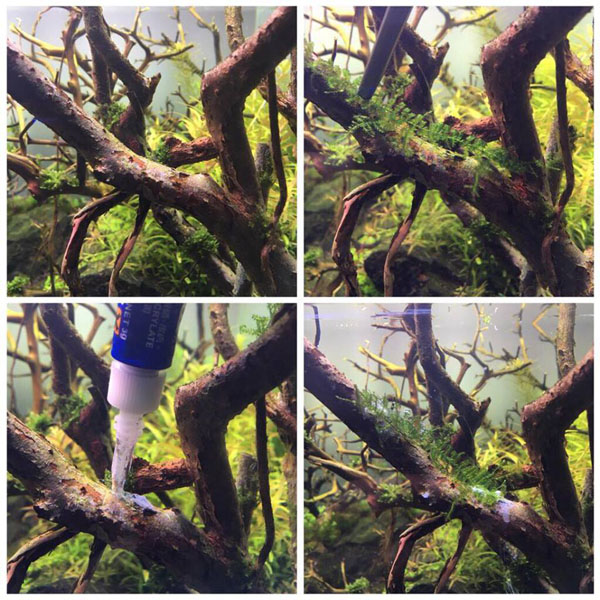
Today we will attach moss to the branches. Our hero is this glue.
First step, lower the water level to below where we want to attach the moss. Squeeze out a little bit of glue on the location (and I really mean a little bit).
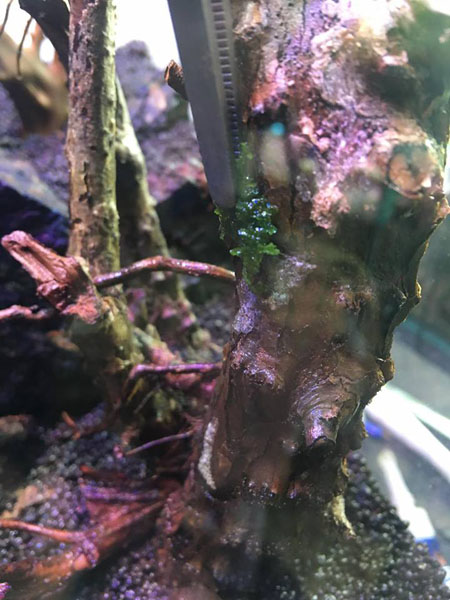
Then, attach the moss.
Done! Attach the moss to all the places we think looks good and natural.
Attach the moss neatly. One trick is to attach them where light can get to. Don’t stick them to shaded areas otherwise they will not look grow well.
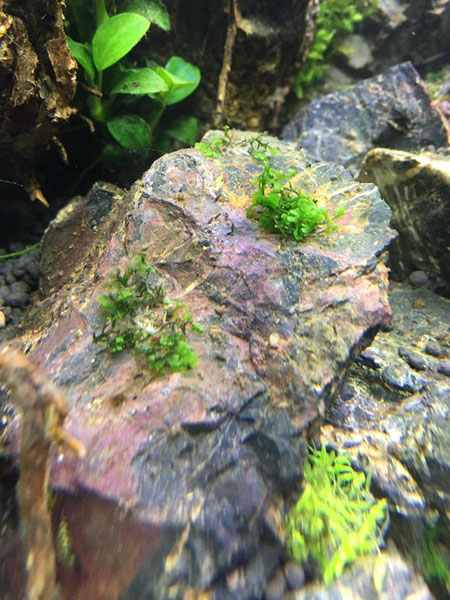
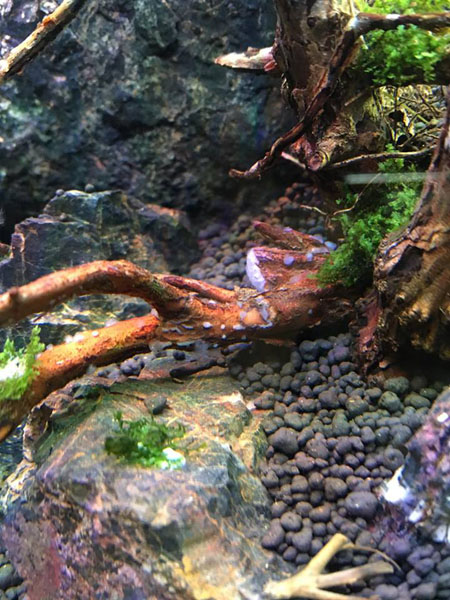
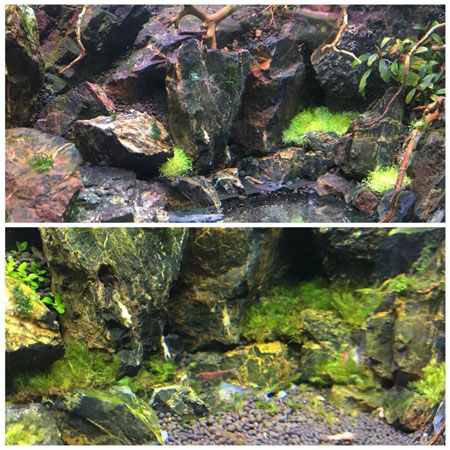
You can also attach them to rocks. Here I attached Riccadia graeffei on them.
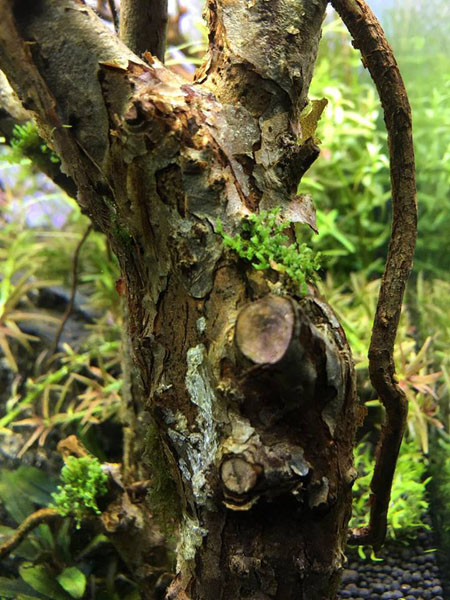
Close-up view.
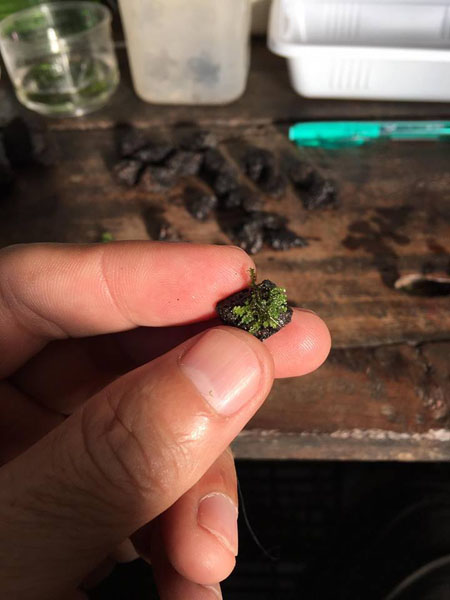
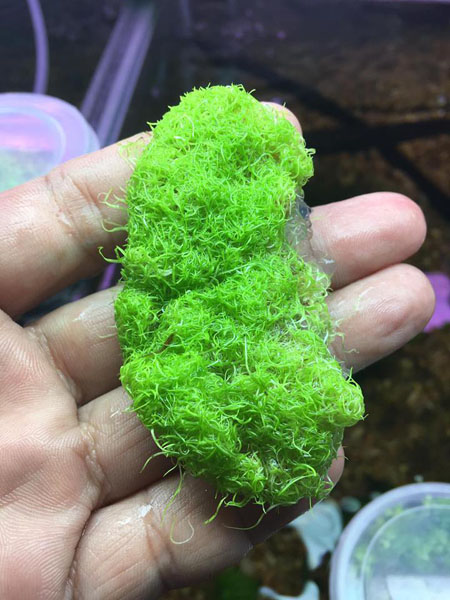
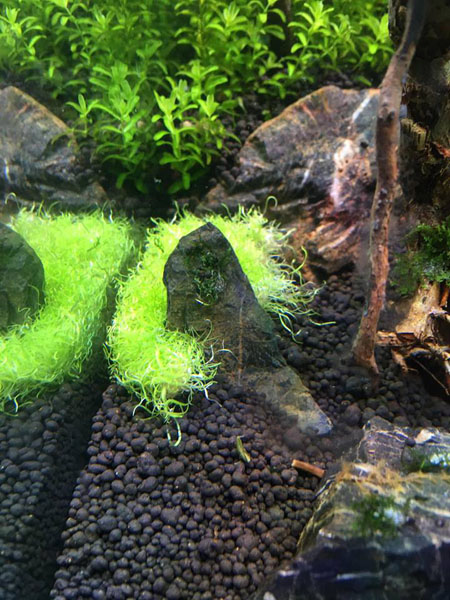
Once the planting is done, I now turn to preparing moss balls for decoration.
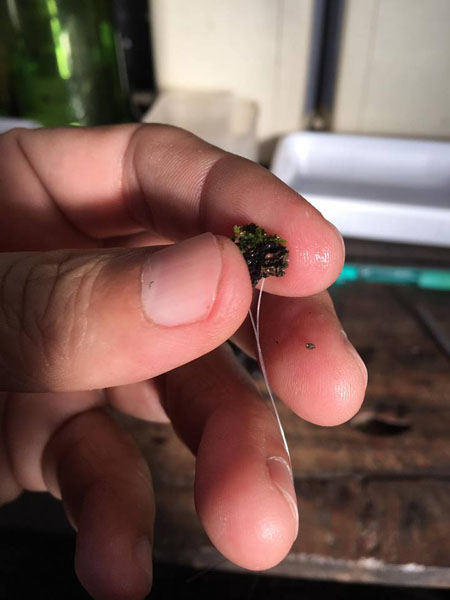
I tied them to small volcanic stones with fishing line.
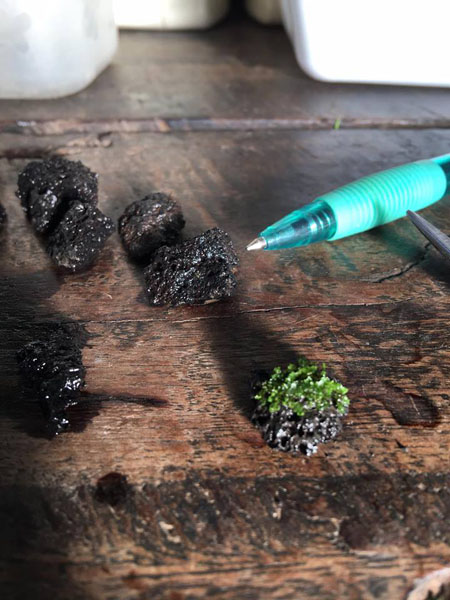
Various sizes, large and small.
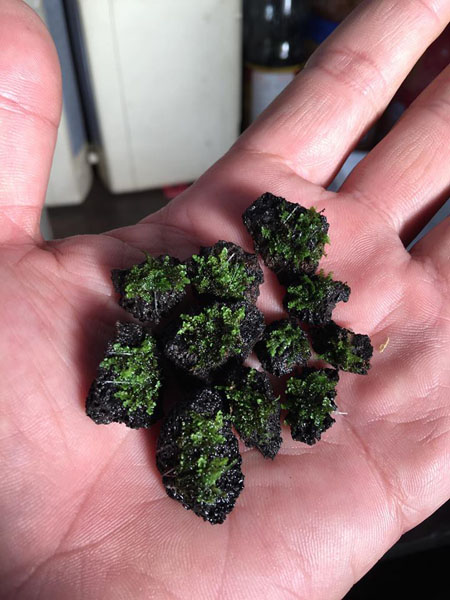
After finishing, I will grow them out separately and will use them to decorate the water way in my scape once it is close to completion.
Problems that I faced slightly after setting up the tank. I have to mention that the solutions that I used has no theoretical explanation but rather from my own experience.
1. Plants melted even when they appeared to be growing well. I handle this issue by making more frequent water changes, add more bacteria, and adding in some oxygen after lights off. It helps a bit (I am guessing that this happens because the tank has not cycled).
2. Algae on branches and rocks. This tend to happen in new tanks where the tank isn’t fully cycled. I correct this by changing the water every 3 days, add bacteria, and aerate the water after lights out.
3. Slime on wood. For this, you don’t have to do anything. When you do water change, use the hose to suck out some but don’t worry if some remains. This is because once the plants take hold, I will add a couple mollies and they will eat the slime. They also take care of surface scum as well.

Today I inserted some Fissidens sp. into cracks between the rocks. In addition to visually softening the rock edges, they also help prevent soil from spilling out.
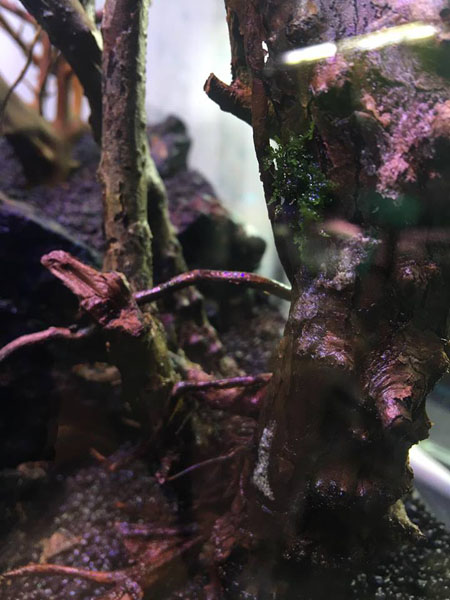
Today we will be attaching some moss to the branches. The unusual thing about what we will be doing is that we will do this under water without lowering the water level. We can do it right in the water. This is why I like this glue so much. Just as in the picture, once we have selected a branch that we want to attach the moss, squeeze a little bit of glue on to the branch, and press some moss on. Very easy.
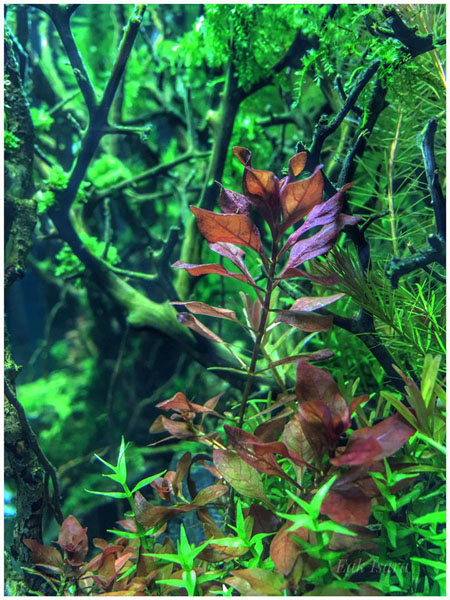
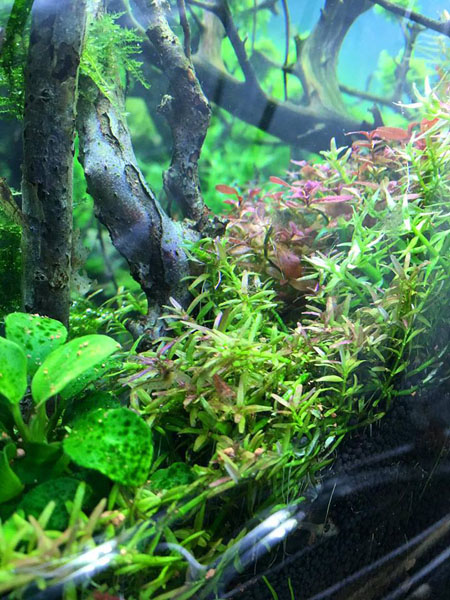
There has been some changes. On the right side, I replaced one of the groups of Rotala sp. HRA and replaced them with Ludwigia sp. SuperRed “mini” because personally, I felt that when the Rotala is exposed to strong light, it will bend down and leave too much space in that area.
Once again there has been some changes. The U. gramminifolia that I stuffed in the rock crevices did not survive due to the soil layer being too thin and insufficient light. So I switched to Fissidens instead.
First trim after allowing the plants to grow until it reached the surface. It took 2 weeks at 6 hours per day lighting. The reason I left it until it reached the surface before trimming is because I want to allow enough time for the roots to strengthen. After the first trim, I will add 1 more hour to the photo period, and I will continue to increase 1 hour each week until it reaches 9 hours/day.
I use regular wave-shaped scissors to trim. It makes trimming very convenient.
Today I added Ludwigia “guinea” to the left side of the tank because I felt there was too much green.
The overall picture.
Normally I will change 30-40% of the water every week. However after every 2 water changes I will change almost 100% of the water. I have a feeling that the plants appear livelier when they get a total water change (not sure if it is just me). When doing large water changes you need to make sure that the water is free of Chlorine and the temperature of the new water is not too different. Otherwise your fish and shrimps may die because it can not adapt.
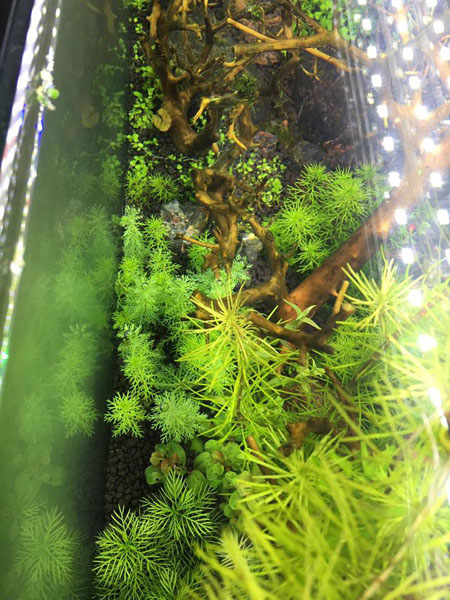
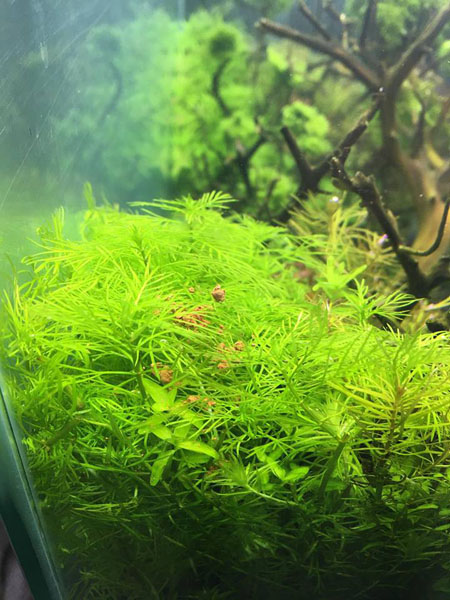
Rotala mexicana “Goiás” is creeping well. It will get redder if I increase the photoperiod. Right now I am at 7 hours/day.
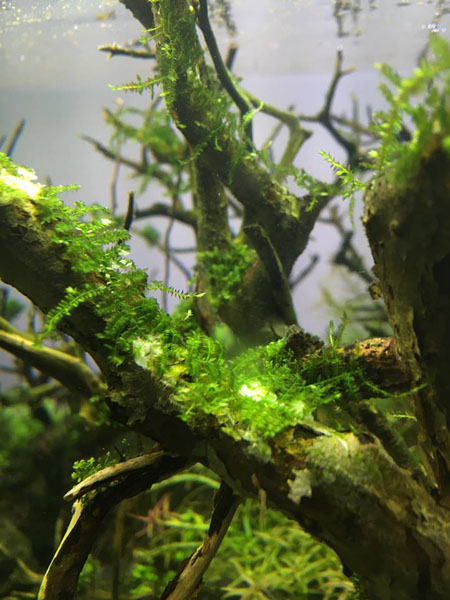
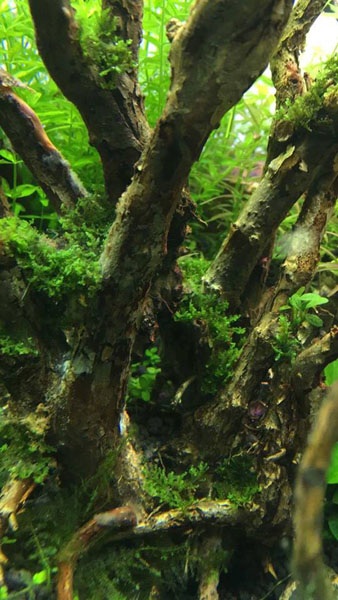
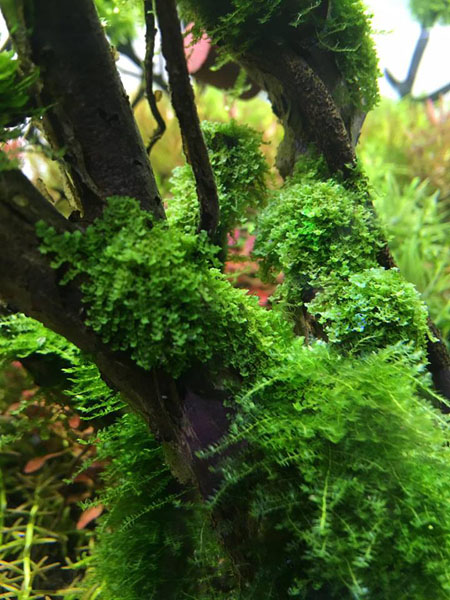
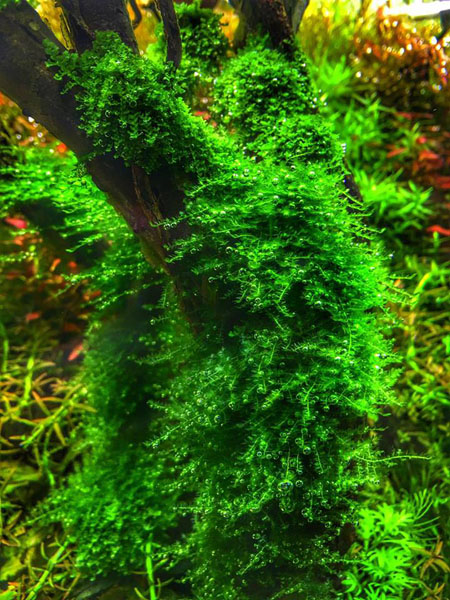
Moss that I attached have now taken hold. They are beginning to send out new buds.
I wish you wealth, prosperity, and accomplishment in this Chinese New Year.

After lights out I will aerate the water via an airstone everyday. The reason for this is I remembered that from Amano. I don’t quite know the scientific explanation, but perhaps it helps the bacteria function better because I noticed that the water becomes apparently clearer and the plants look livelier as well. The slime also disappeared. Those who have not tried this might want to give it a try.
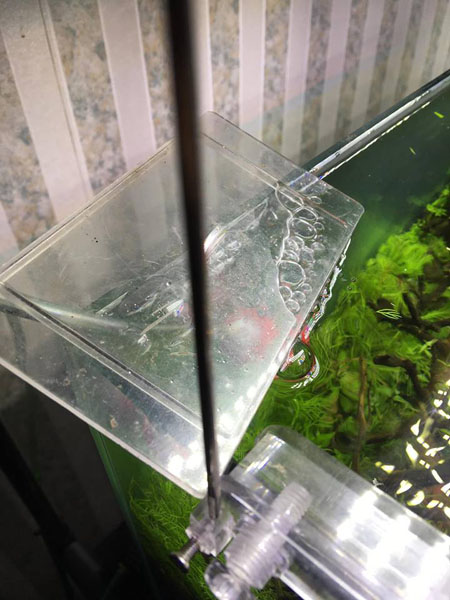
Don’t forget to find something to cover up the tank above the airstone or it might spill all over.
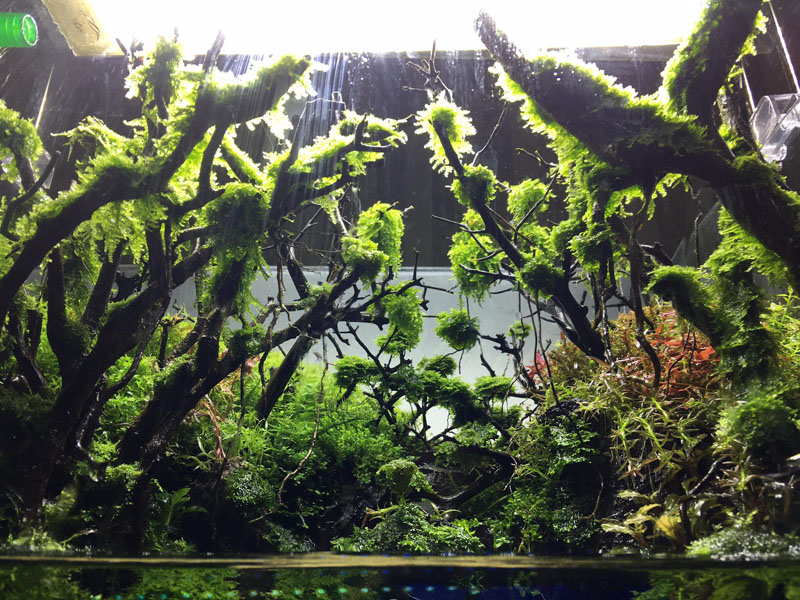
Mood and feel from a single lamp.
When I finished trimming I noticed the nice reflection off the glass so I captured a picture for you.
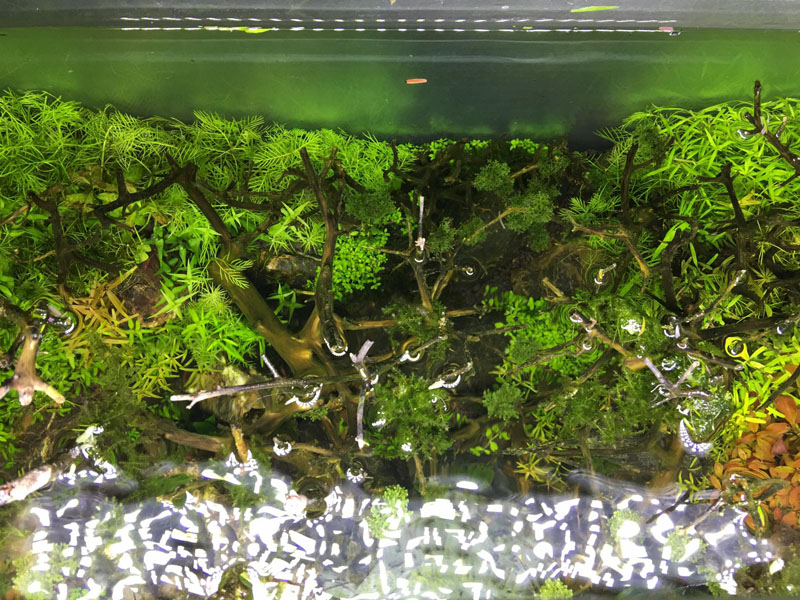
Top view.
Side view.

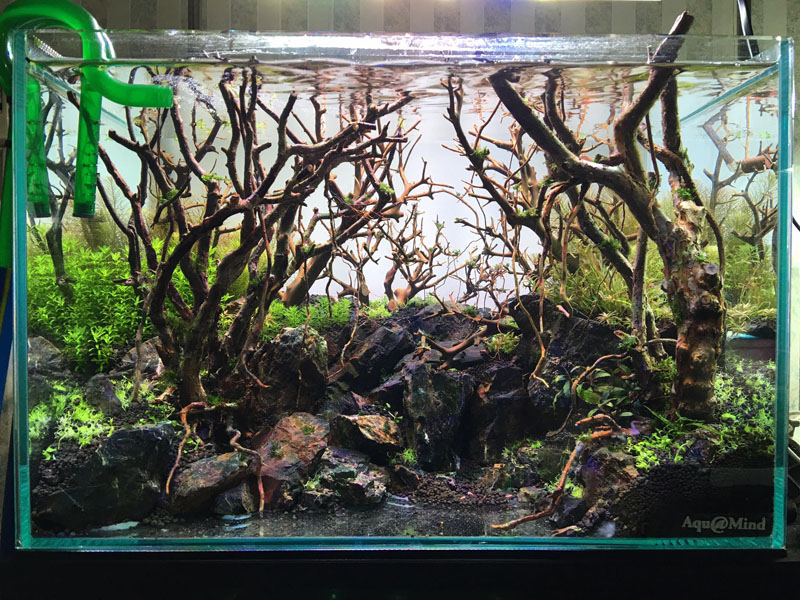
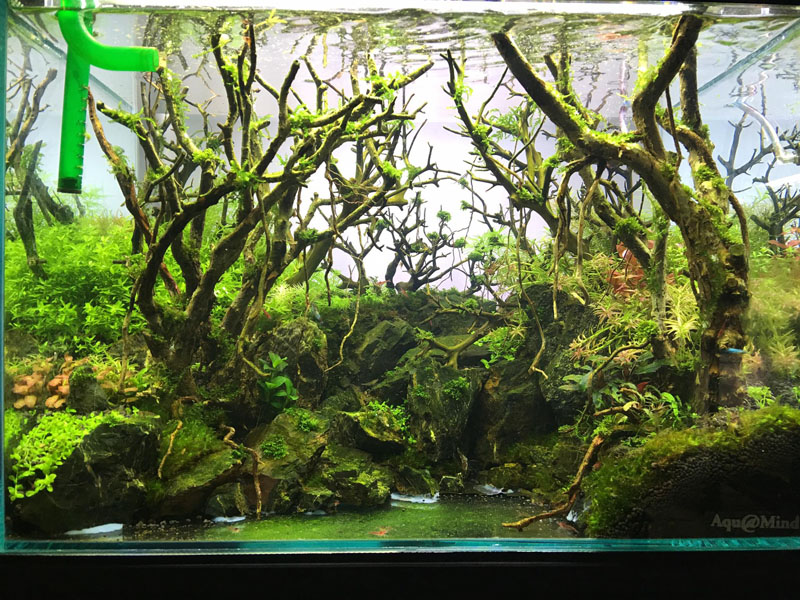
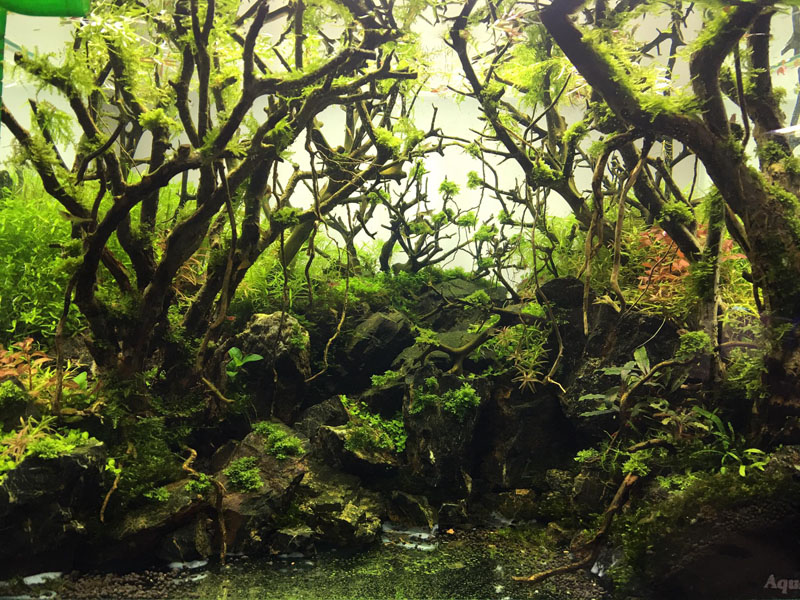
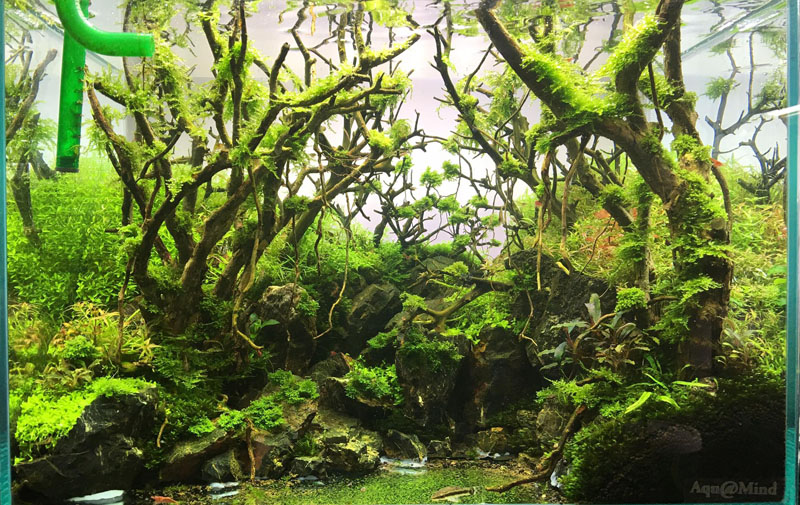
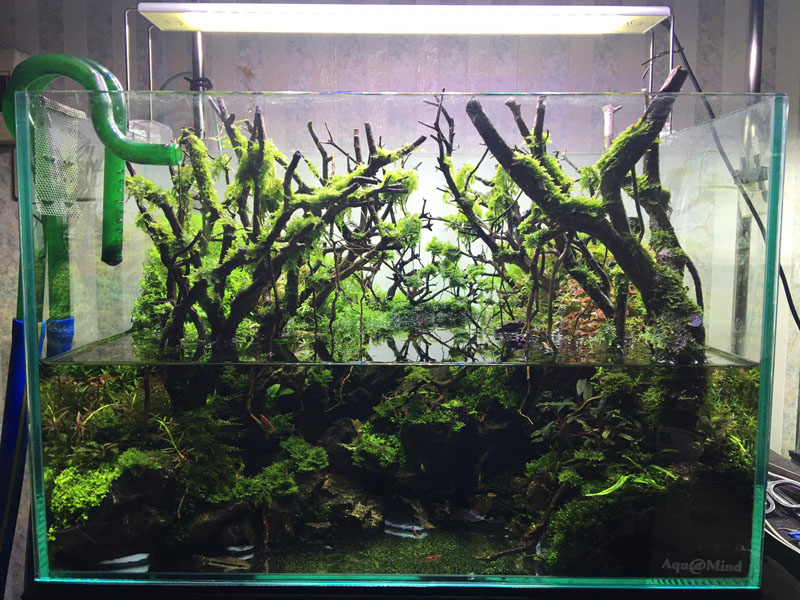
The over picture after the trim. The final picture should look similar to this. The stem plants in the background would be slightly taller. Stay tuned.
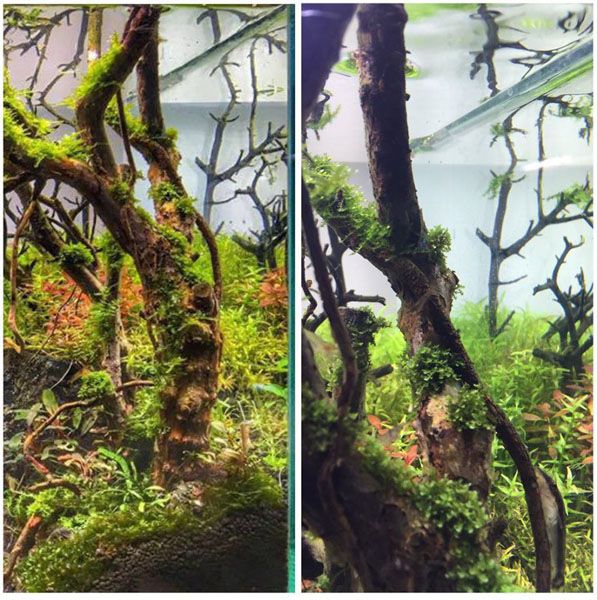
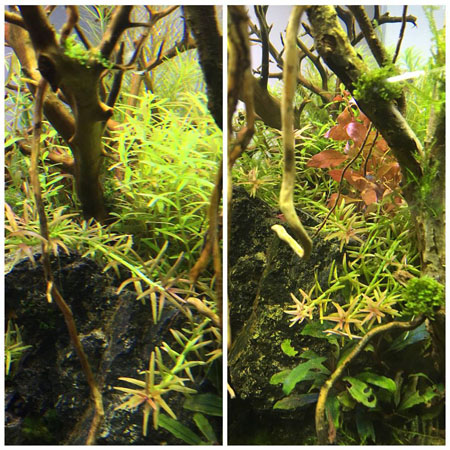
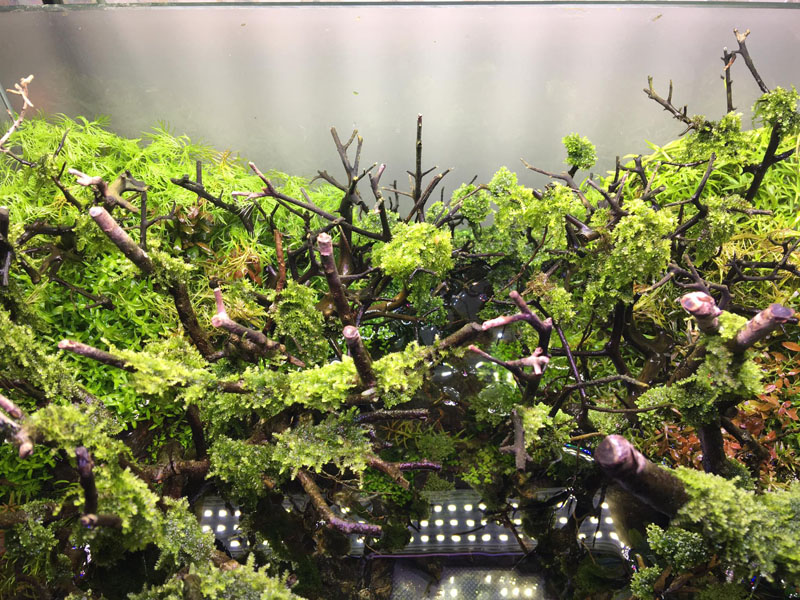
The other day after I took some photos of the tank, I noticed that one of the branches in the back looked a bit bare. So I added some liveliness to it.
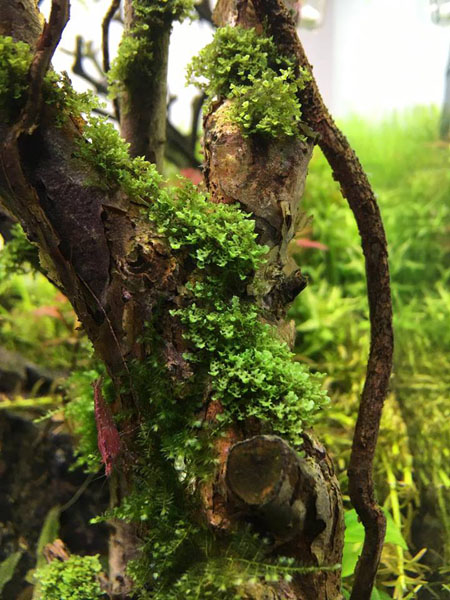
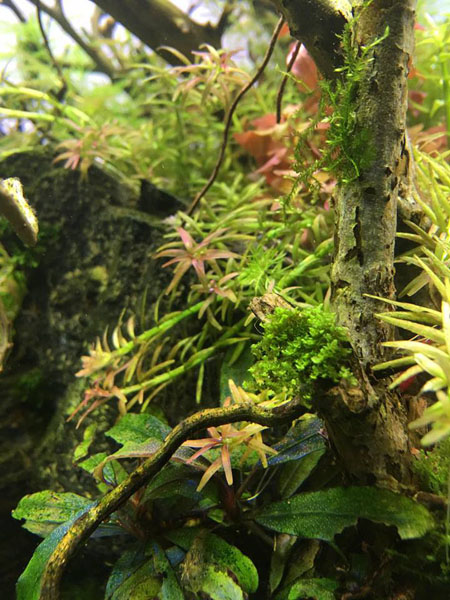
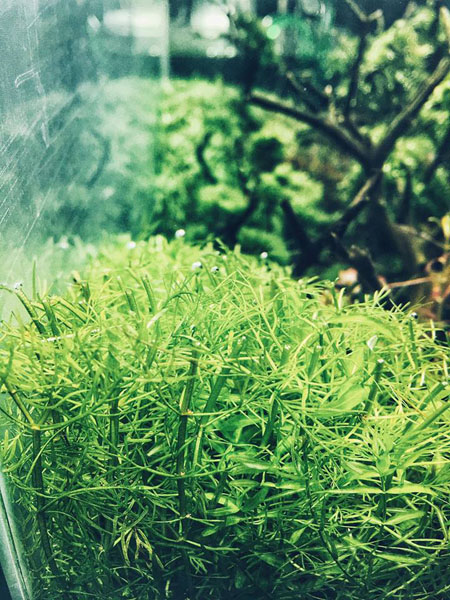
The mosses are just perfect right now. I really don’t want them to grow any larger.
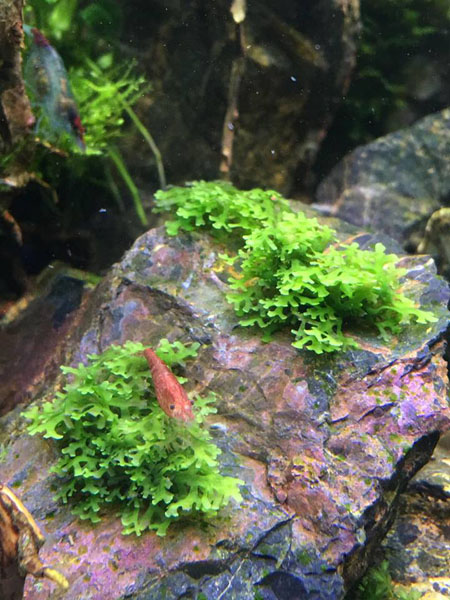
The Riccadia have taken hold and starting to expand sideways.
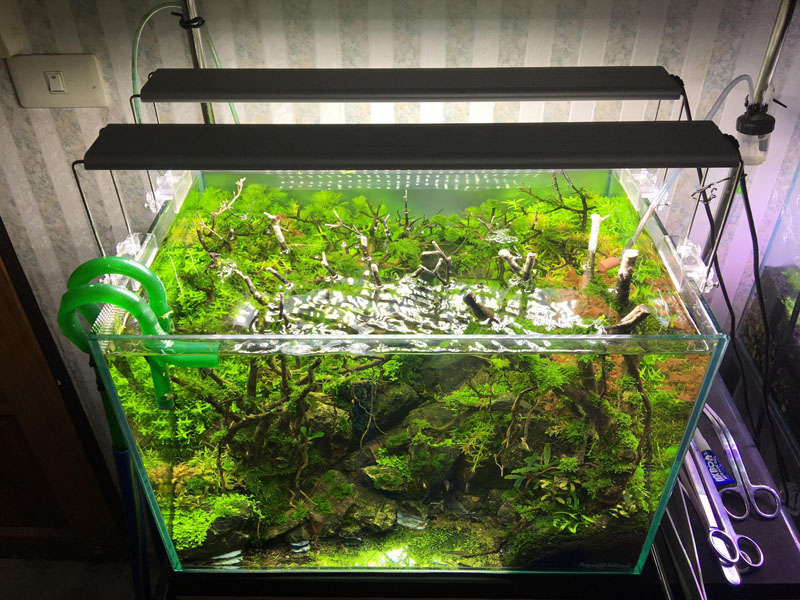
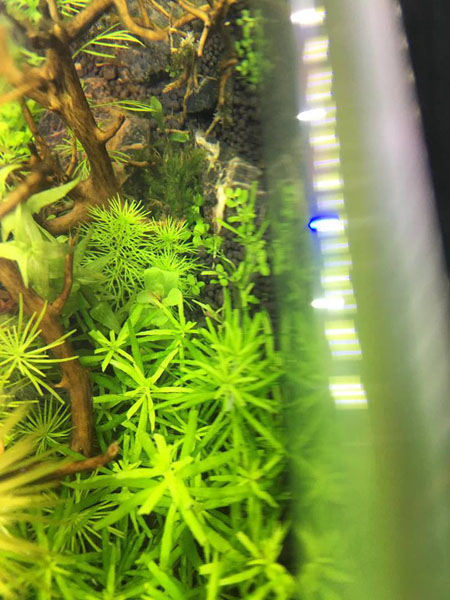
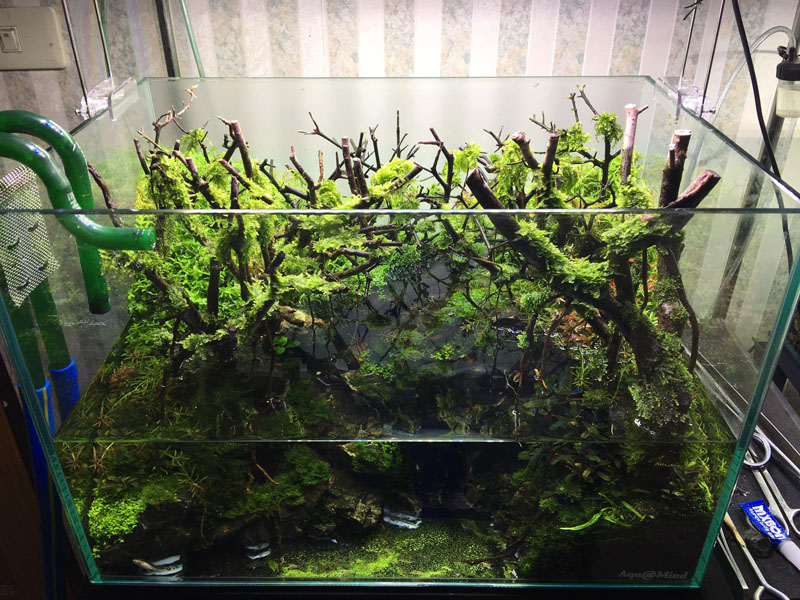
Regarding the placement of the 2 A-series lights, I placed them on the included stand as shown in the picture. The reason that I raised them up is because I have mosses that are very close to the surface and I am afraid they would turn yellow under too intense lighting. Right now I have it on level 5 and 8 hours/day.
I’ll be adding the sand to the river bed in about 2 weeks. Stay tuned.
Today I trimmed the plants for the 2nd time.

Today we will be trimming the moss. Many of you wonder if we need to trim the moss after attaching them. Yes, we do. This is to make them appear soft and bushy. This is similar to when we trim stem plants but the difference is that the time interval between trimming may be longer. To trim, just simply follow the contour of the wood they are attached to.
Today I did a water change so I snapped some pictures.
Top view
After every water change, I will sprinkle some bacteria powder into the tank to replenish those washed away. I sprinkle them directly onto the plants. The shrimps will take care of them overnight and you won’t see it anymore in the morning.
Sprinkle the bacteria powder over the entire tank. In densely-planted regions, sprinkle even more.
Full frontal shot.
I will trim the plants one more time and add the sand.
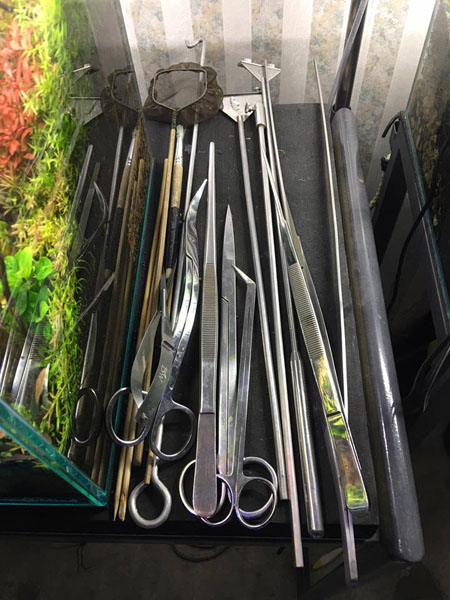
So many tools for just one small planted tank.
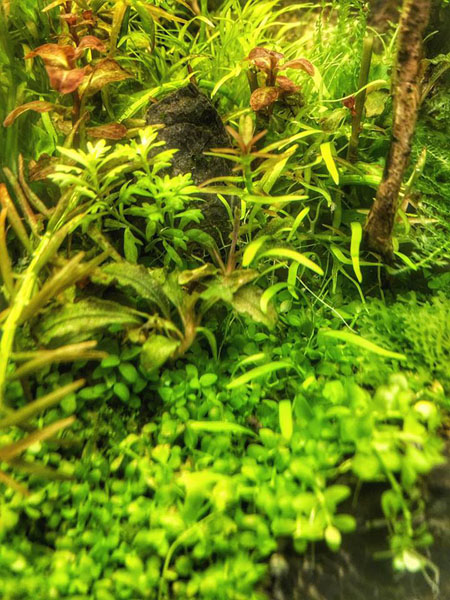
The Utricularia graminifolia is finally blending in with the Monte Carlo. Just the way I envisioned it.
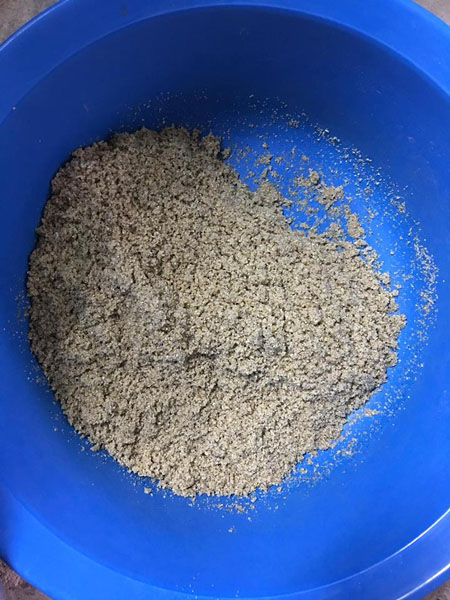
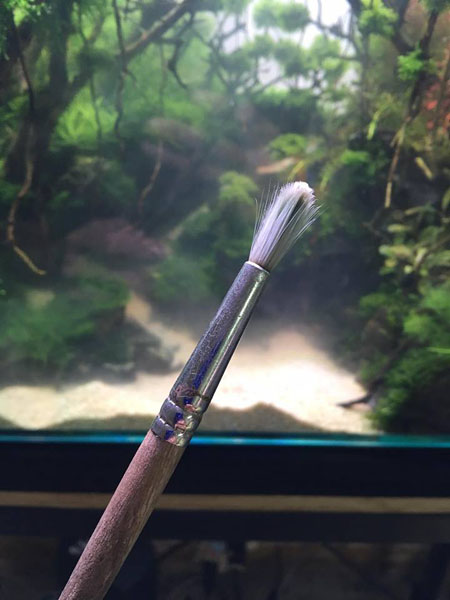
Today I will show you how to add the cosmetic sand. You should wash the sand multiple times. Sand from certain brands don’t even needed to be washed. However, the sand that I am using requires washing.
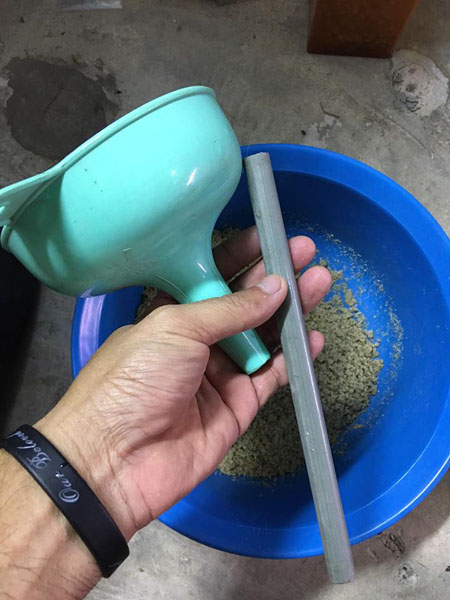
The tools that I used: a funnel and a plastic pipe
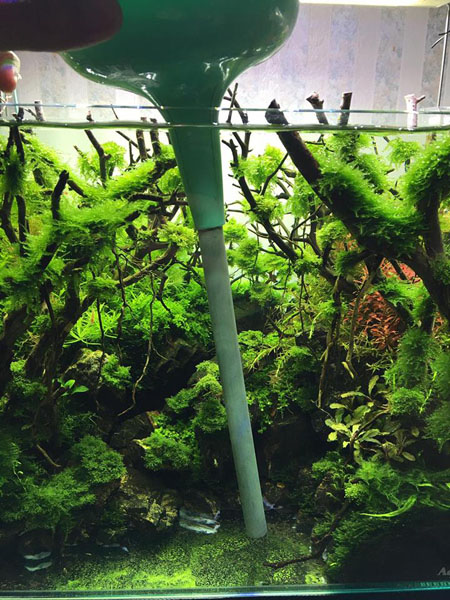
This is what it looks like when assembled.
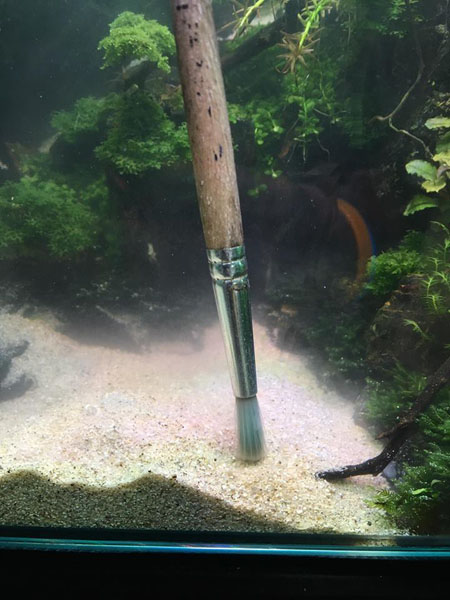
Then, you can begin.
You can just point the tip of the pipe to where you want to add the sand.
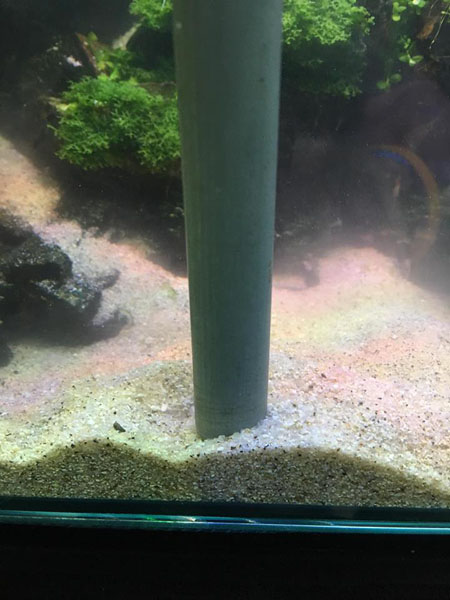
The trick is to first unplug the filter and place the tip of the pipe as low. When you add the sand, it will generate an impact force that may stir up the fine particles. Once we have added the sand through the funnel, then gently raise the pipe up. You can see that I managed to generate some dust cloud. This is after washing the sand many times.
Once I am done adding the sand, this is what I used to level it. I stole it from my children…lol.
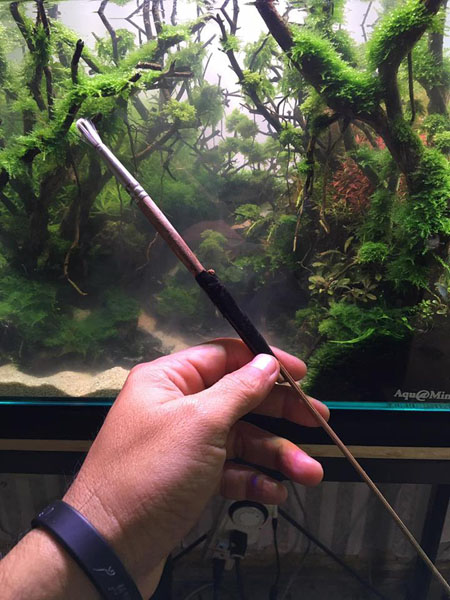
I made it longer like this so my hands don’t have to get wet.
Then you can begin leveling the sand.
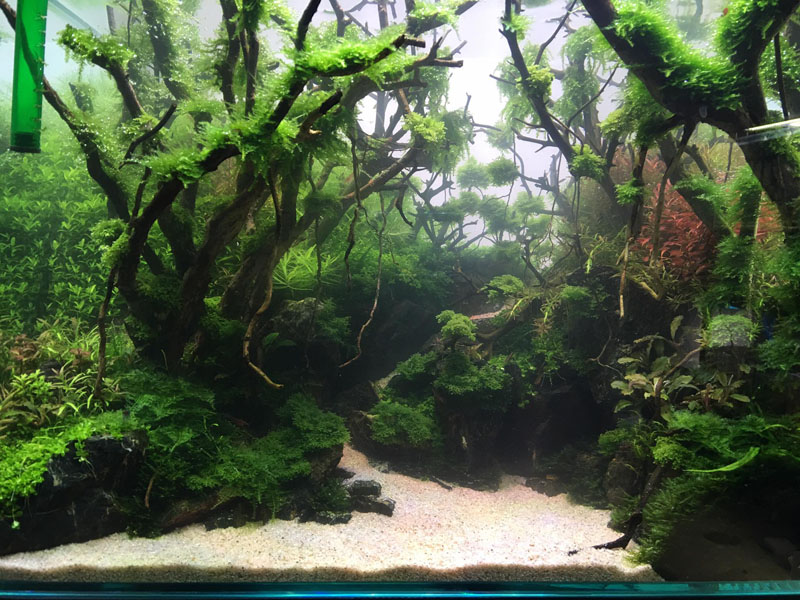
It’s done. Water is a little cloudy from the sand even though I have washed it many times.
These are the materials that I will use to add details to the stream. However I really want everyone to see the real thing at the competition so I’m not going to show it to you right now.

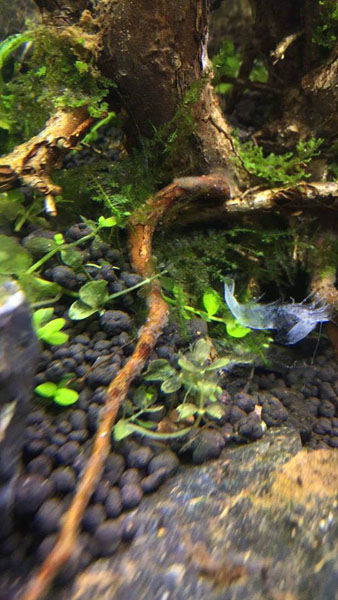
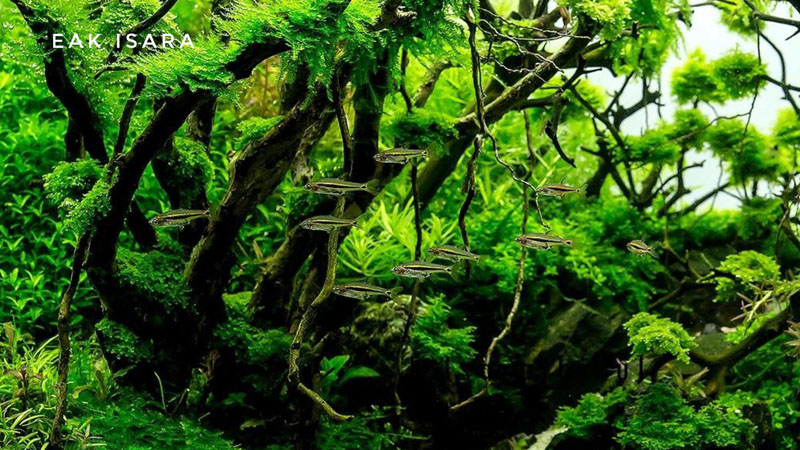
As for the fish for this tank, I chose to add Boraras urophthalmoides
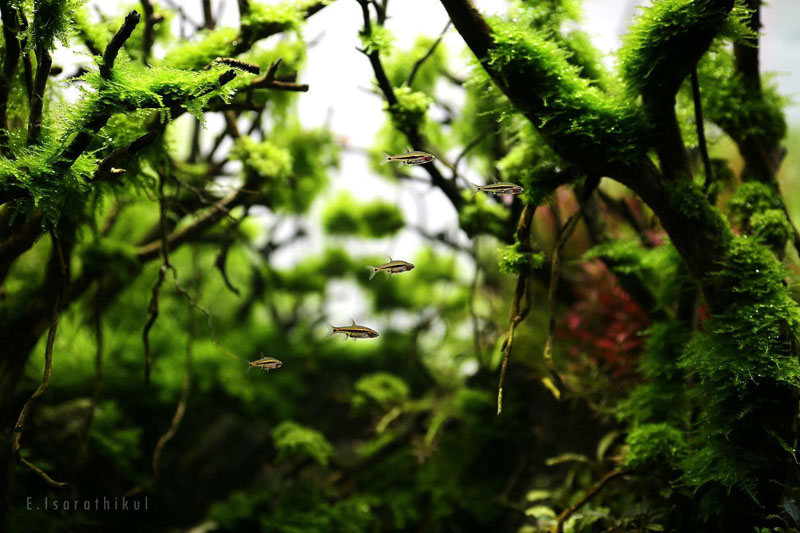
I chose members of the Boraras family because they are small and thus suitable for small competition tanks.
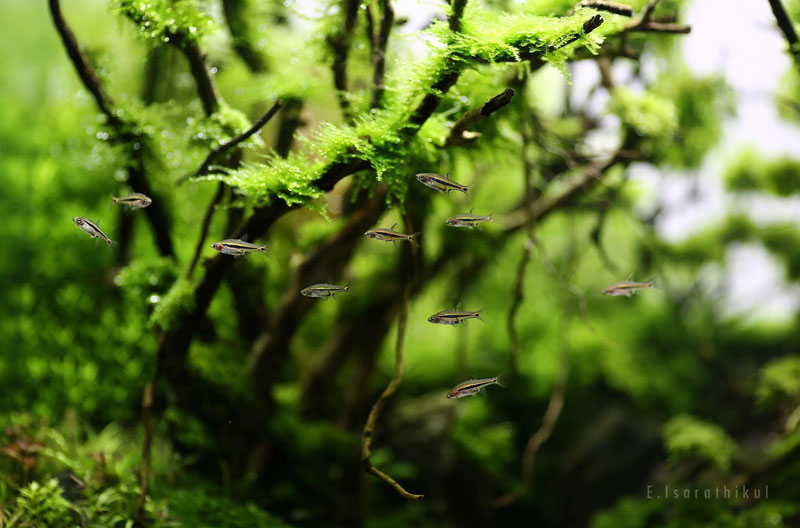
Another important point is that they like to move around in groups, which makes them easier to photograph.
I’m about to do one last trim before the competition.

When it is time to photograph the tank for our international judges, here’s how I forced the fish to swim in tight groups.
Last trim. See this tank in person at the Atlantis, JJ Mall on April 1-9, 2017
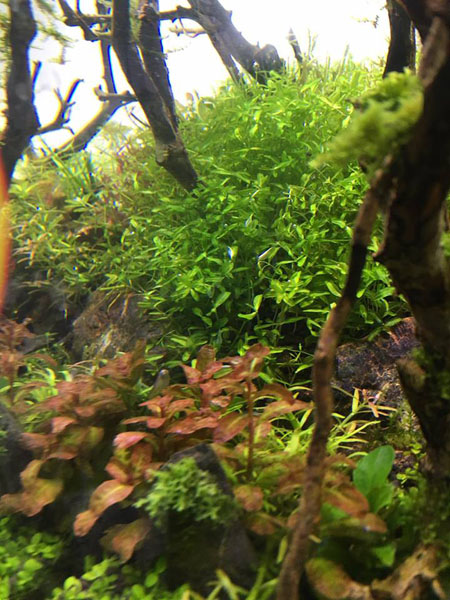
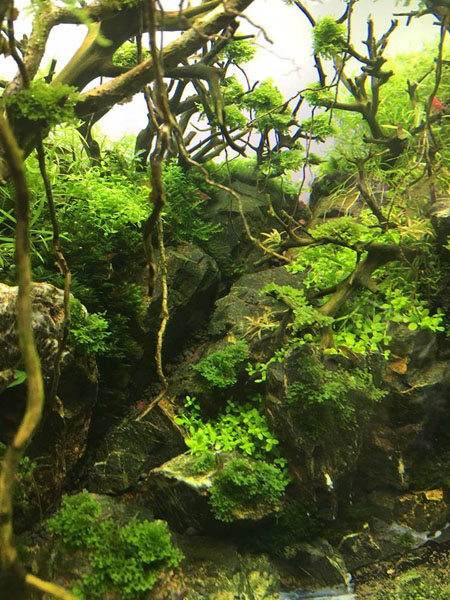
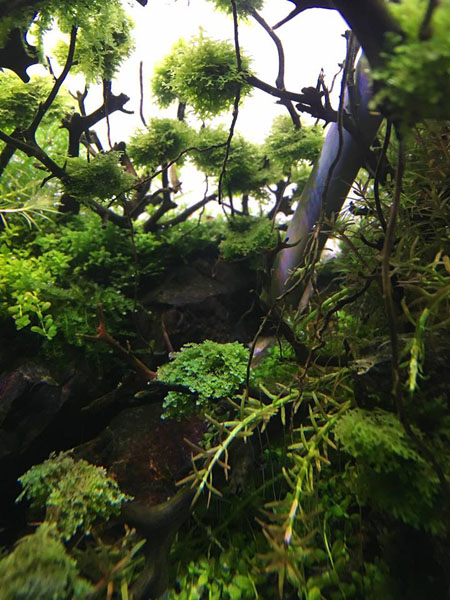
My favorite corner.
Group formation.
Today I changed almost all the water.
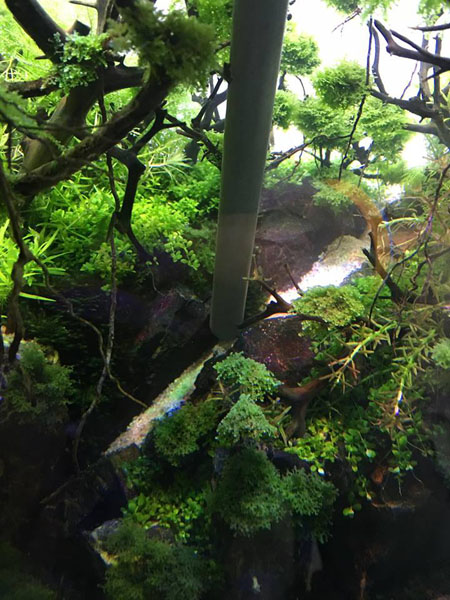
Upward view.
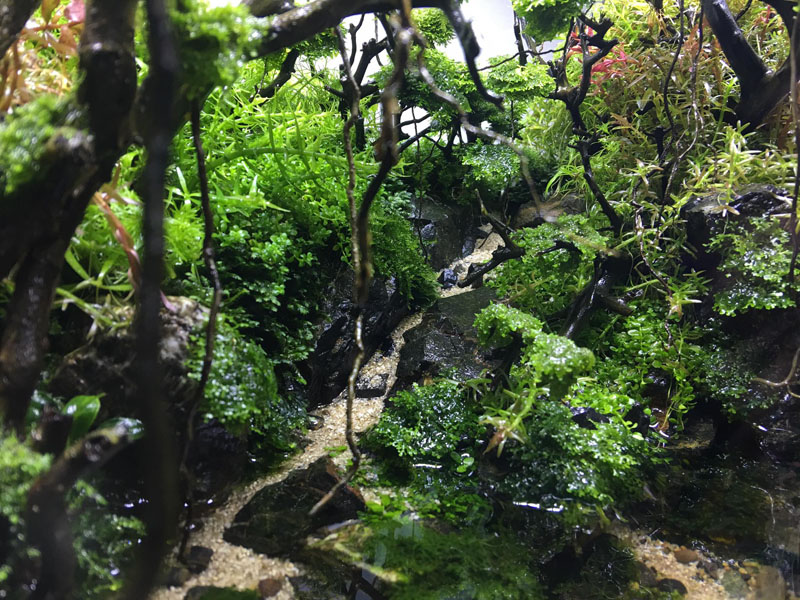
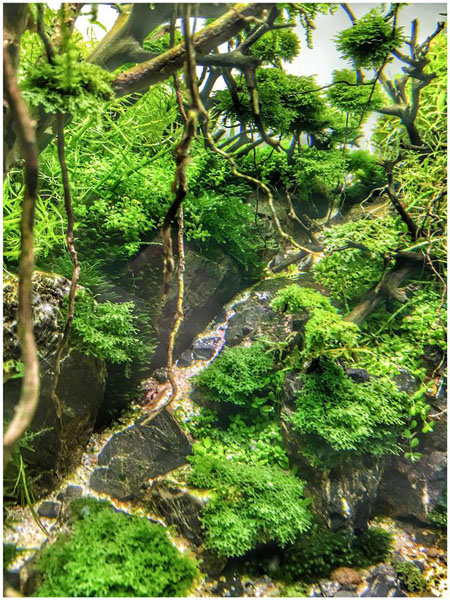
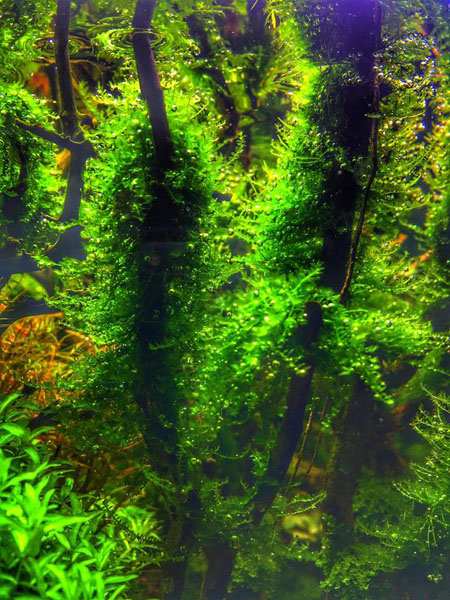
The water way.
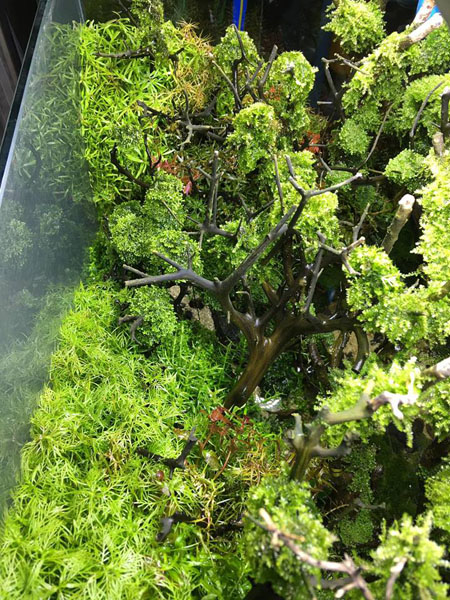
Bird’s eye view.
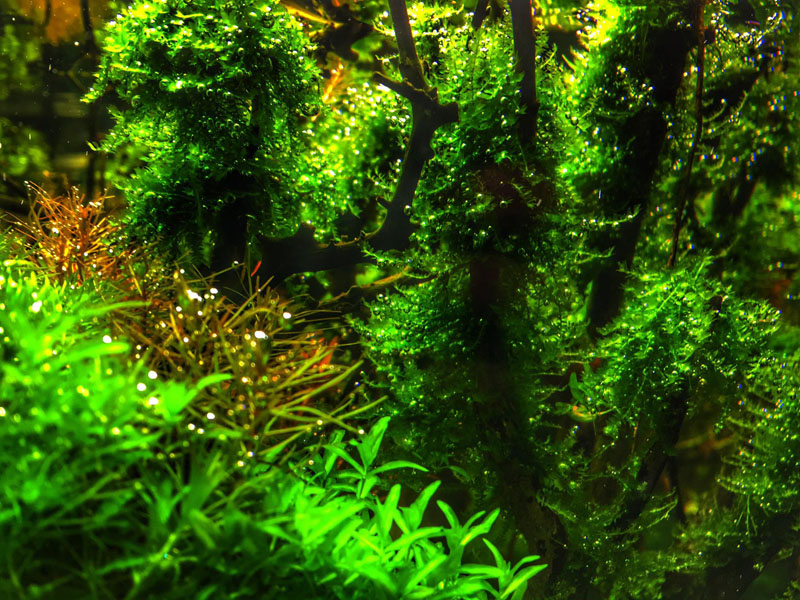
Crystal moss in its full glory.
Ramped up the CO2
Ramped up the CO2
Even the moss is pearling.

The journey of this tank has finally arrived at its destination. Right now it is on display at the event venue. For the past 4 months that I have tended it, I gave it my all. I hope the information I provided will help you in some way. I am happy to demonstrate my techniques to everyone. If there are any mistakes or points lacking, I apologize. For those who would like to see the real tank along with 10 other beautiful scapes, please come to the Atlantis, JJ Mall starting tomorrow onwards.
Thank you all.
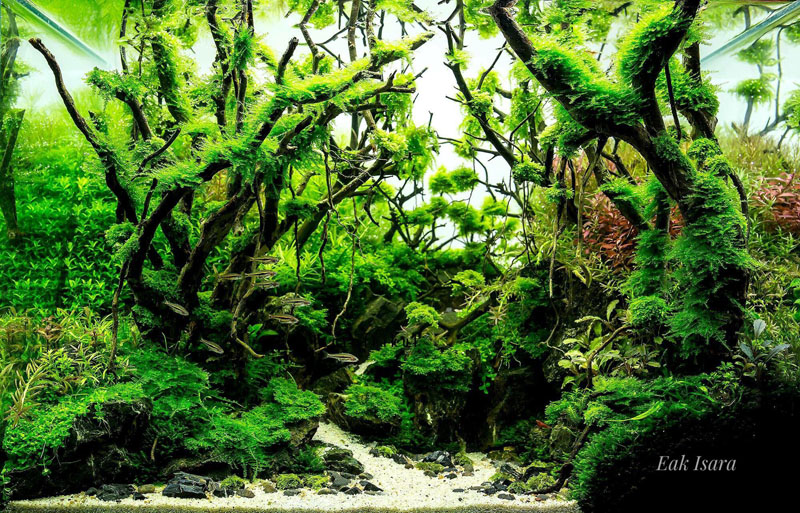
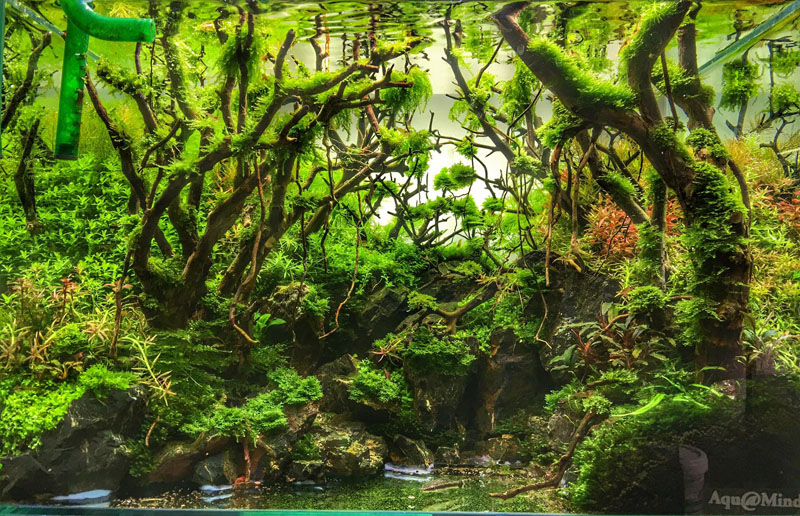
I forgot to tell you the name of this tank. I call it “River flows in you” and this is the last picture from me. Thanks everyone for following my work and I apologize in advance for any mistakes or anything lacking.