Project Description
Entry #4: Chonlatee Jaturonrusmee

Mr. Chonlatee Jaturonrusmee a.k.a “Nicotin”
A brief introduction: My name is “Tin” and I have been into planted aquariums for about 8 years. The style that I like is Nature Style and I have been in and out of various competitions in the past. This is the 3rd time I have participate in the ACT aquscape contest.
The Thai version can be found here.
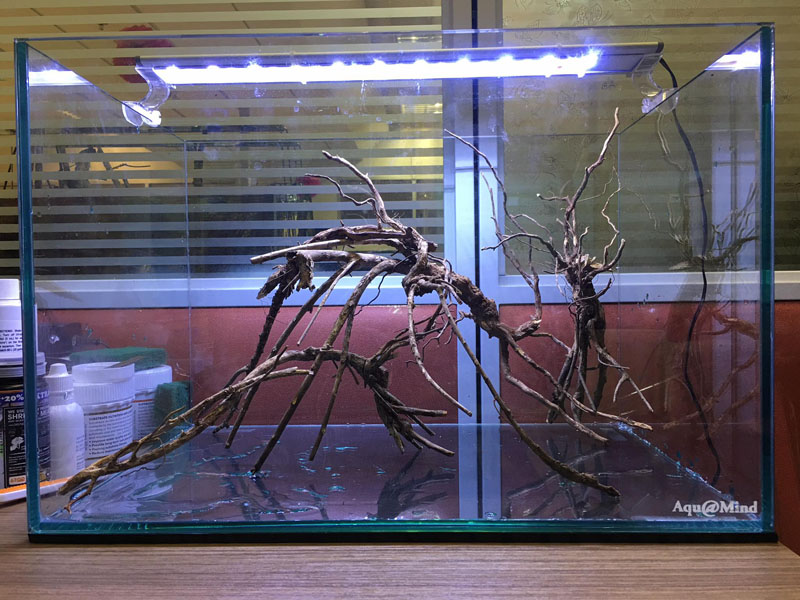
Today is the first day of the ACTAC4 Nanoscape competition. So today I am starting with a rough layout.
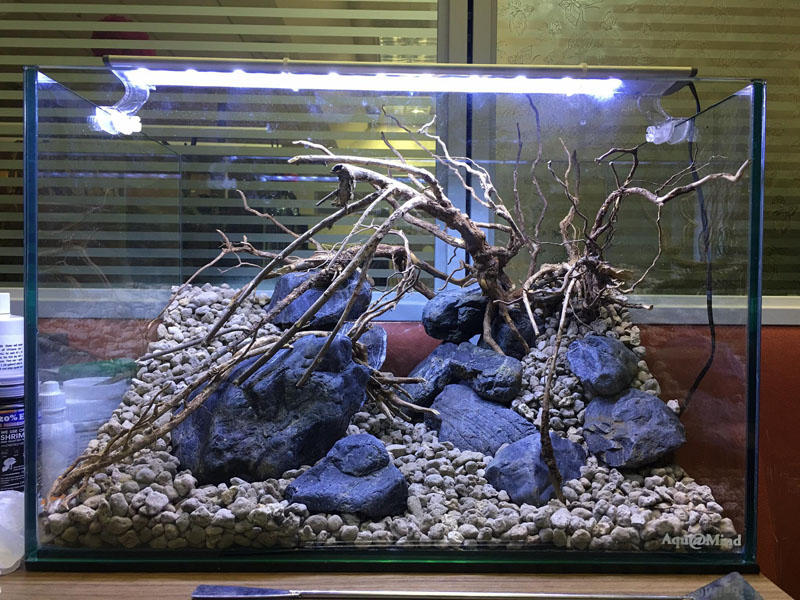
I fill the bottom layer with pumic stones and roughly placed the rocks. The rocks that I used are of the same type as before, which are inexpensive local rocks. You just need to select the ones with interesting patterns.
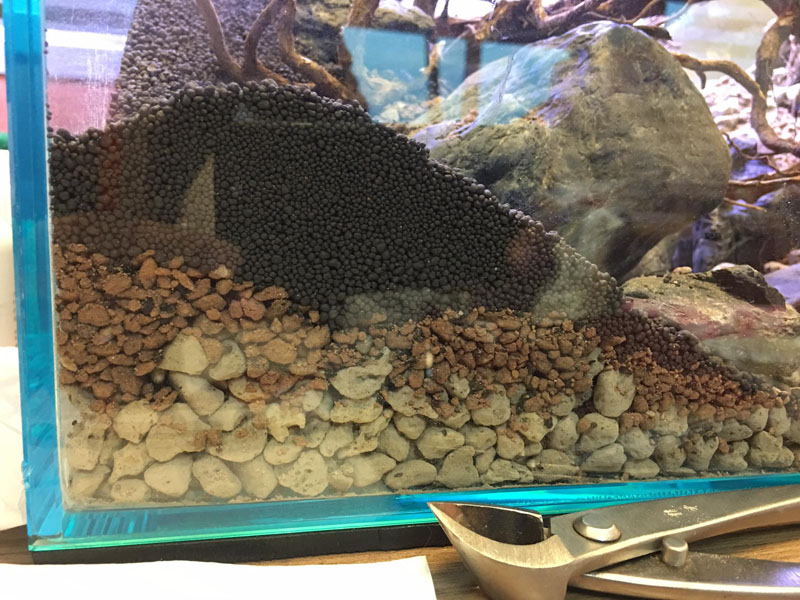
One other problem for some people is that when you used pumice as a base substrate and pour the soil on top, the soil granules will not be able to fill the pumice layer. This is quite unsightly especially at the front of the tank. Some might not bother but for those who do, I have a technique to recommend.
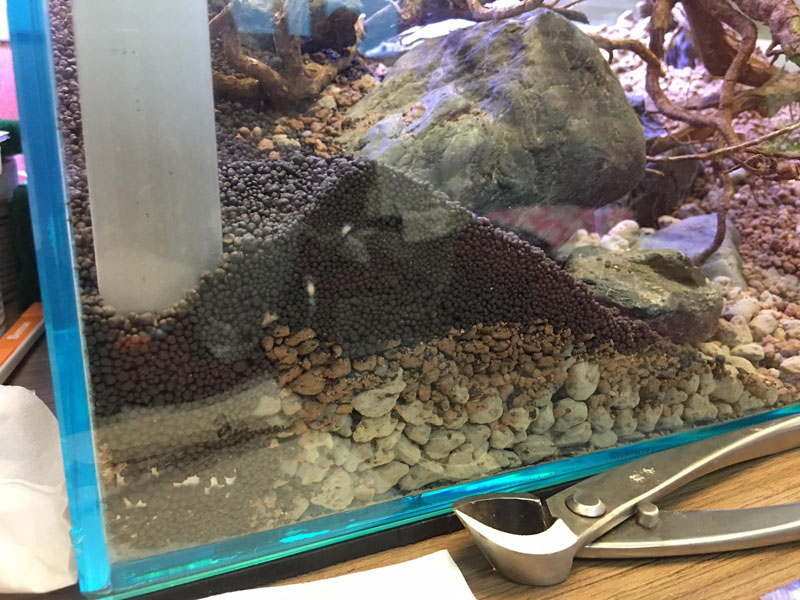
To solve the problem that I mentioned, just use an iron or aluminum ruler and press down at the front next to the glass. Soil granules will trickle down to the bottom on its own. Once the soil granules fill in, pull the ruler up and move to a new spot. Repeat this for the entire length of the front glass.
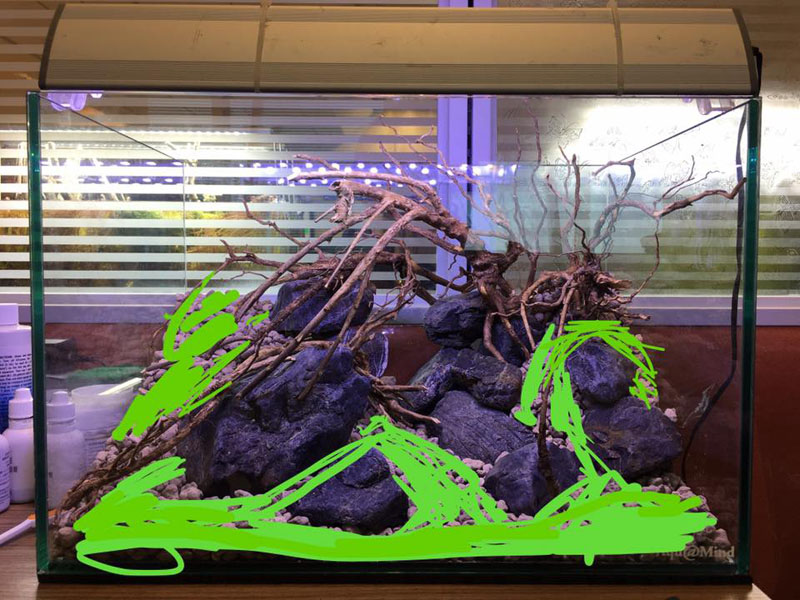
After doing a rough layout, it is time to recall my childhood coloring skills.

Another easy way to reduce the rigid appearance of the wood is to use pliers to cut the tips at an angle. This can reduce their blunt, stiff look.
Today’s a holiday and I’ve spent several hours staring at my layout. As I predicted, I tore it down and made some changes. This is the downside of spending a lot of time and staring at your layout. It caused me to tear down the layout in the blink of an eye. And now version 2 is born. I’m still sitting here looking at the layout..just in case there will be version 3.
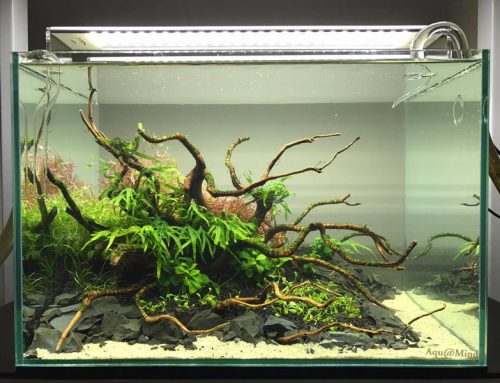
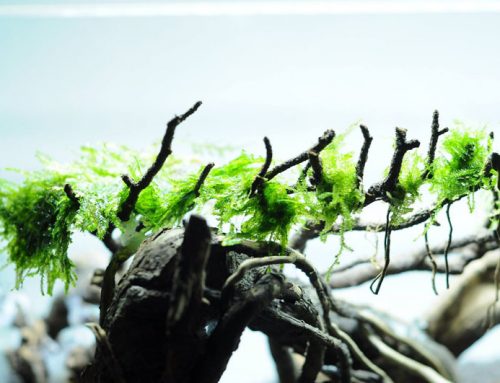
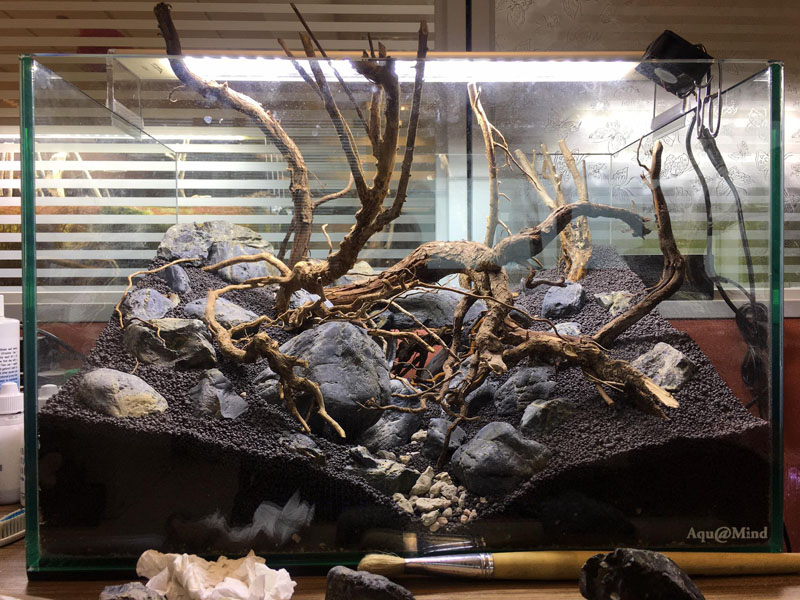
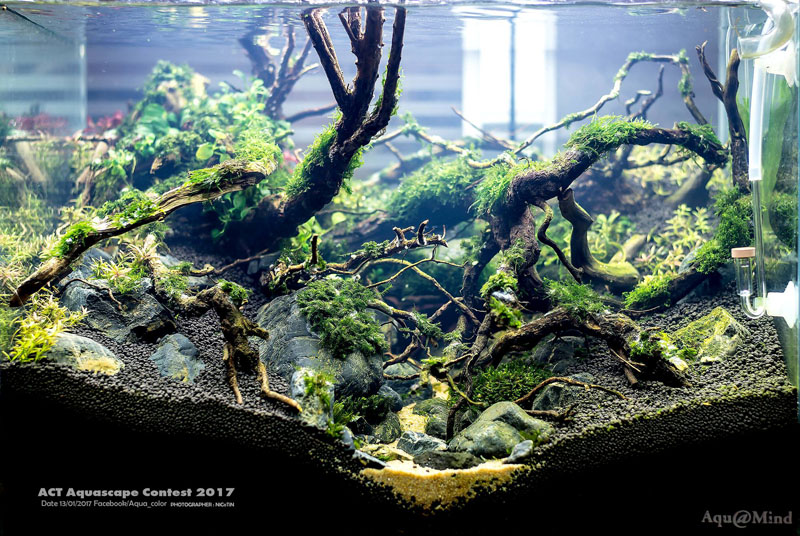
The layout is almost done. Only small details remain. This time I used wood of different types. Strictly speaking, this should not be done but this time, I intend to stick moss on them to hide the wood’s texture. “Directionless” is the name of this tank. It is because the lack of clear direction of the wood layout, which might make it appear busy, uneven, and unreal.

In this competition, the theme is Rotala Revolution which encourages the use of any Rotala species. Normally, I seldom use stems in competitions, so I am not used to trimming and handling stem plants. Let’s see how it goes with this one. For the first round, I use: 1) Flame moss and 2 other types of moss I can’t remember. I’ll come back to this later. 2) Bucephalandra (unknown types). 3) Ludwigia, 4) Rotala mexicana
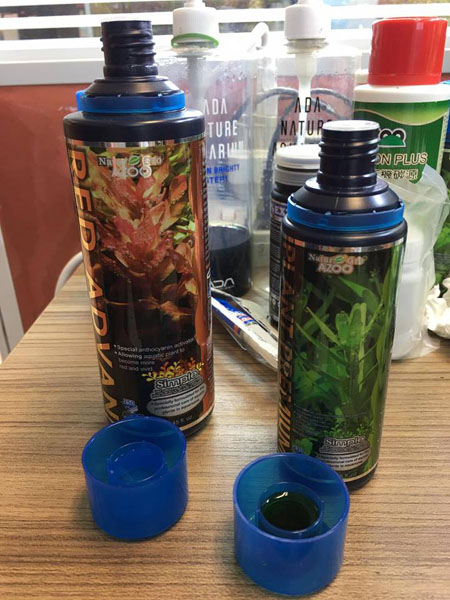
Yesterday I planted, today I will add some liquid fertilizers. For this competition, I am using these two liquid fertilizers by AZOO. I started with less than the recommended doses and wait till the tank is a bit more mature until I use the prescribed doses.
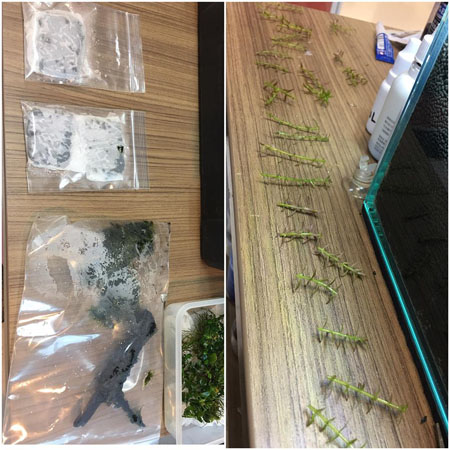
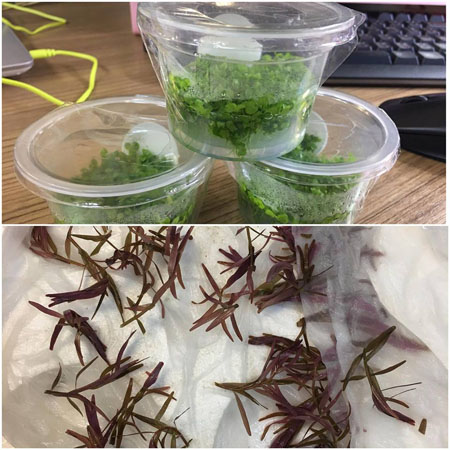
Second round of planting. Today I have Fissidens sp., worm moss (not sure if this is correct), Riccadia, short stems of Rotala mexicana that I prepared, Anubias, and Bucephalandra.
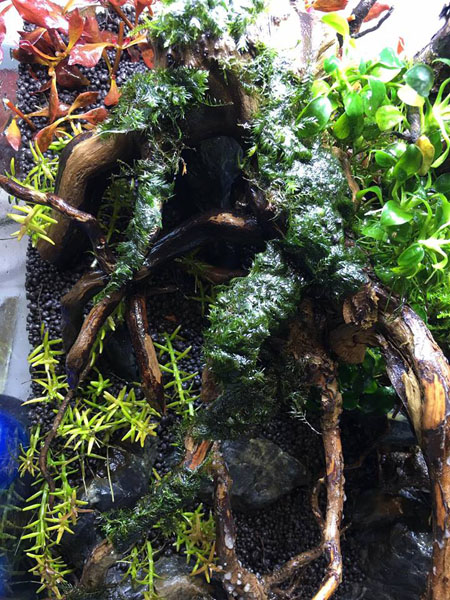
I first wet the surface of the branch, apply some glue, then stick the moss on.
The white residue is just excess glue. You can leave like this and the moss will soon grow over it, or you can stick some more moss to cover it up.
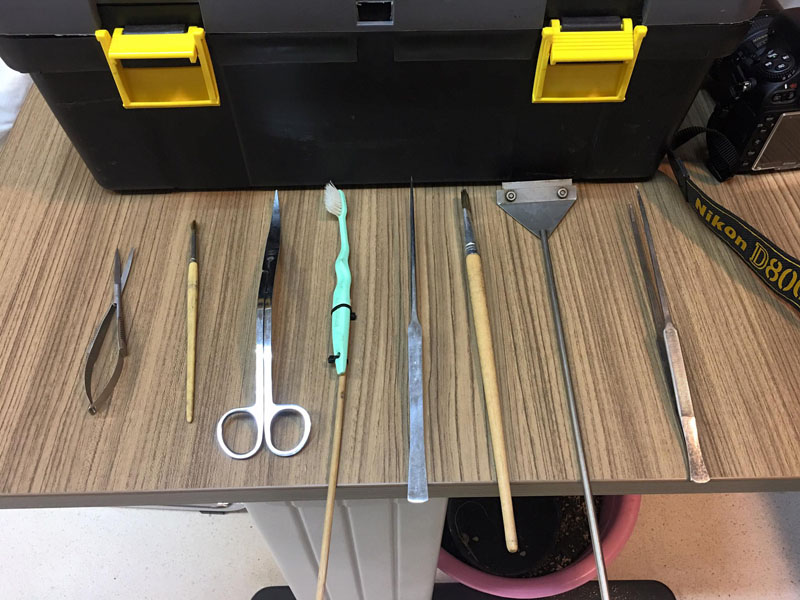
Today is the time to trim the moss and get them into shape. I used these trimming tools almost every time.
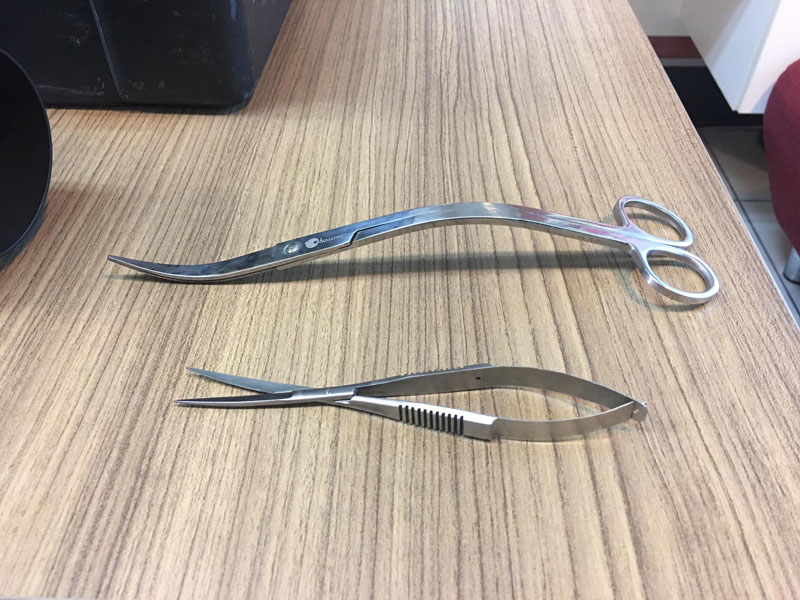
To trim moss that is out in the open, I use the spring scissors because they do a pretty good job at trimming mosses. The scissors is quite lightweight and doesn’t stain your wrist.
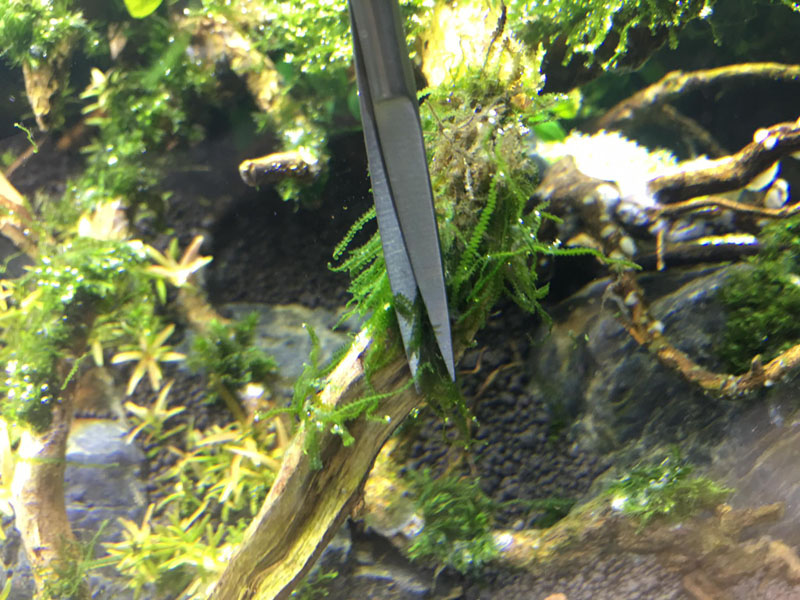
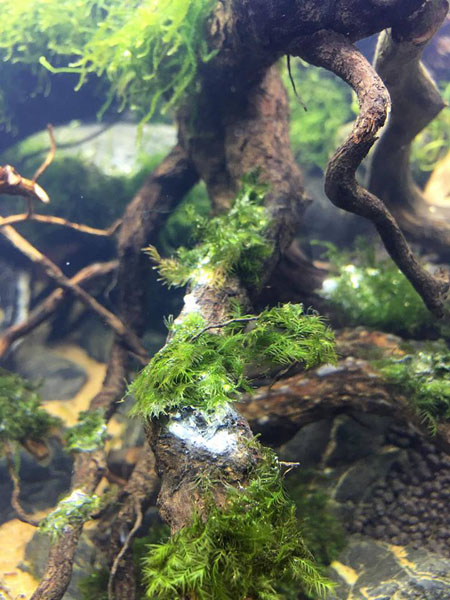
When trimming moss, I trim it right against the wood and wait for it to the new growth to grow onto the wood.
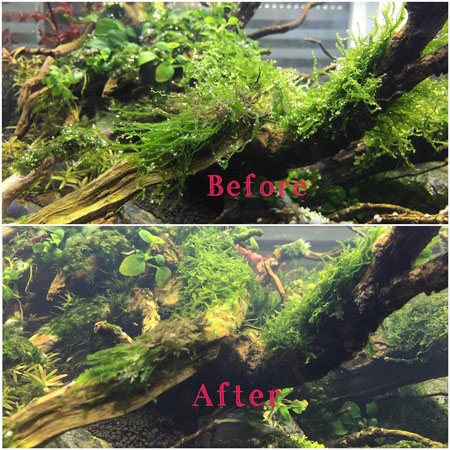
Before and after trimming. One downside when trimming moss is that the moss sinks. This might cause some problems for tanks that have lots of tight spaces. Because of this, I turn off my filter before trimming to prevent the moss from getting blown all over the place.
This is the overall picture after the first trimming. There still remains some space for plants in the front, which I plan to take care of soon. As for the cosmetic sand, I will leave it like this for now.
This evening I will do a 3rd round of planting. The plants will be Micranthemun umbrosum ‘Montecarlo’ accentuated by simple red plants like Rotala rotundifolia.
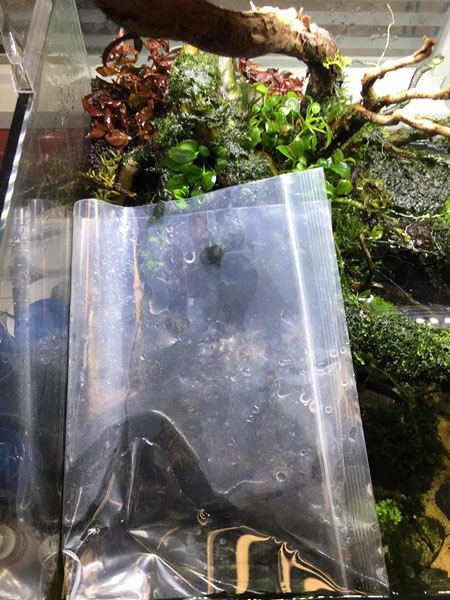
Here is how I fill the tank. I use a ziplock bag to break the force of the water to prevent agitating the soil. The good thing about using a ziplock bag is it will not sink, unlike sponges or filter media.
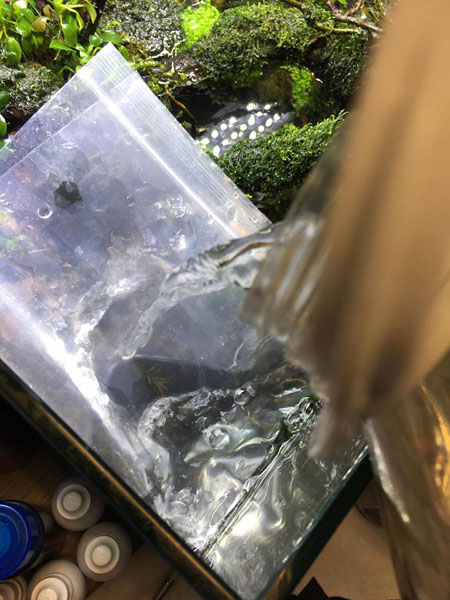
Just find a good location and pour in the water.
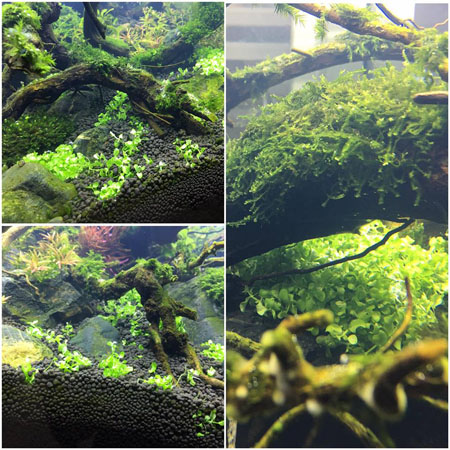
Foreground plants are in. What is left now is just waiting for them to start creeping.
All the plants I wanted to use are planted. I might add some more here and there later on.
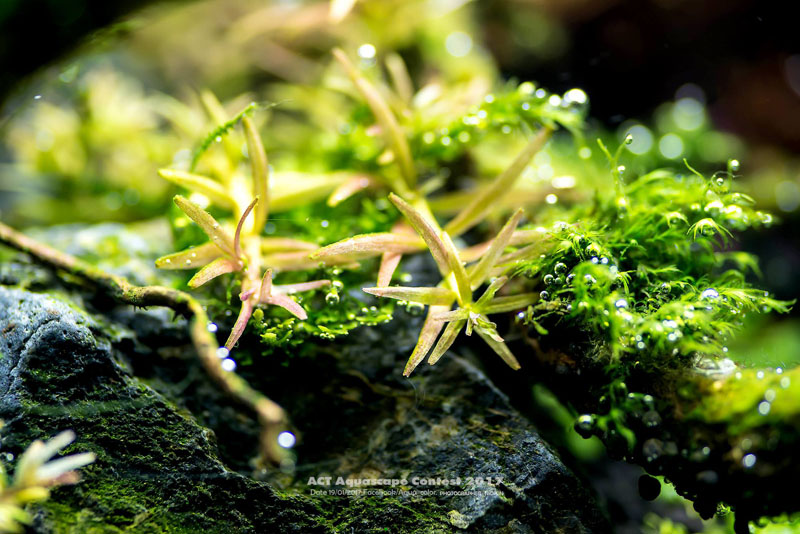
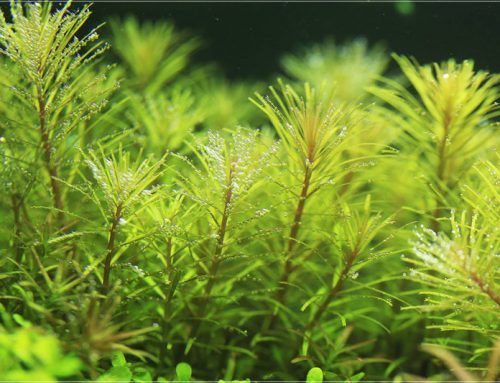
Rotala mexicana is beginning to show its color. From green to now pinkish-orange and starting to creep.
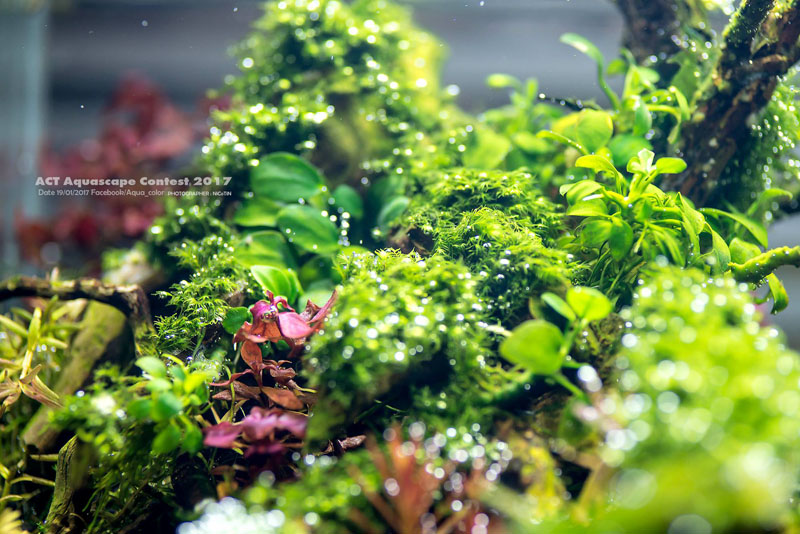
From one more angle before doing a water change.
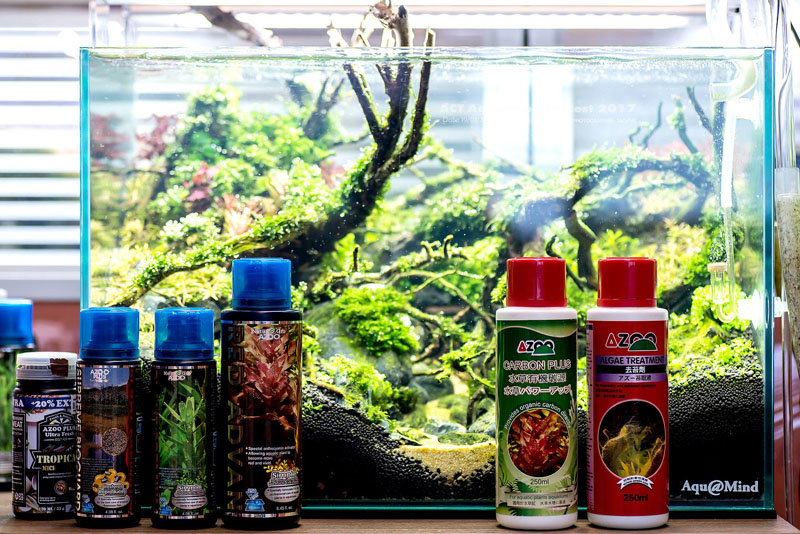
On water changes and usage of fertilizers and algaecide in the first month of setup
For this tank, I divided it up into 2 parts.
1). I will change 50-60% of the water every Mondays and Thursdays for the first month. I will use the fertilizers as shown in the picture which are the 3 bottles on the left. The dose that I will be using is half of the inner cap (the cap has inner and outer rings).
2.) I will add algaecide every Mondays, Wednesdays, and Fridays. They are the 2 bottles on the right. The dose I will use is 1 inner capful.
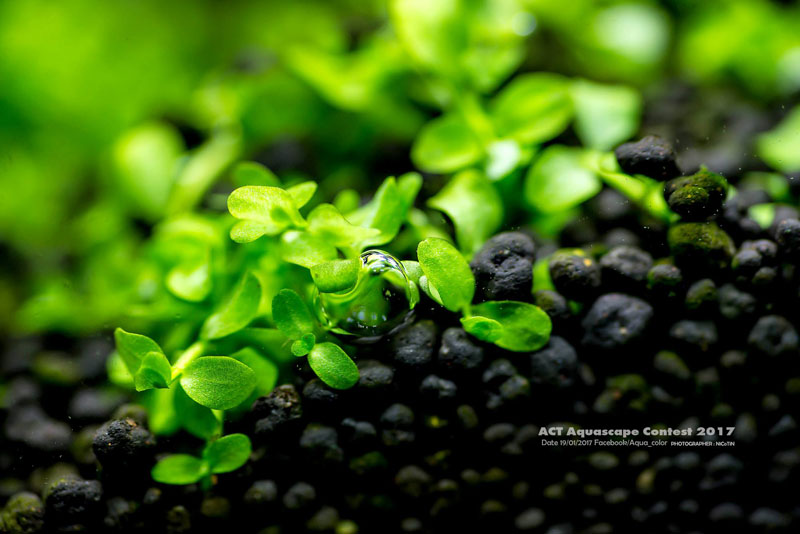
Only one bubble is enough to freshen up the day. Keep on growing and creeping.
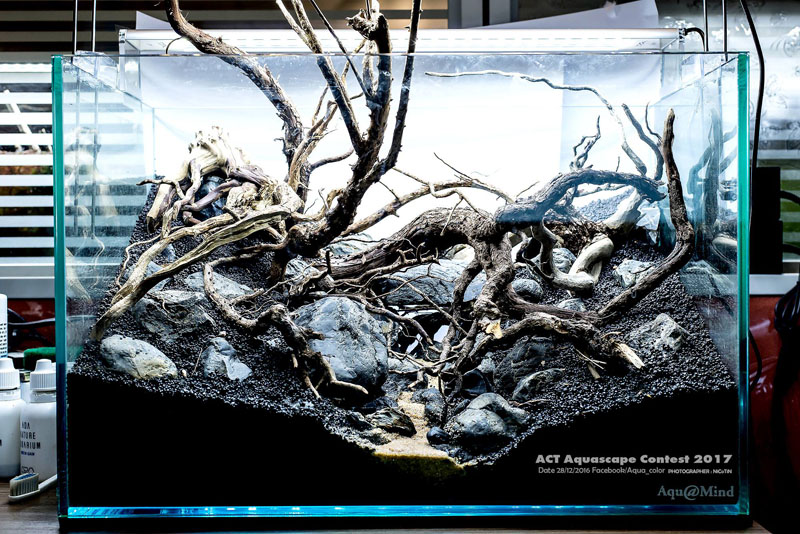
January 19, 2017. Let’s go diving in HD!
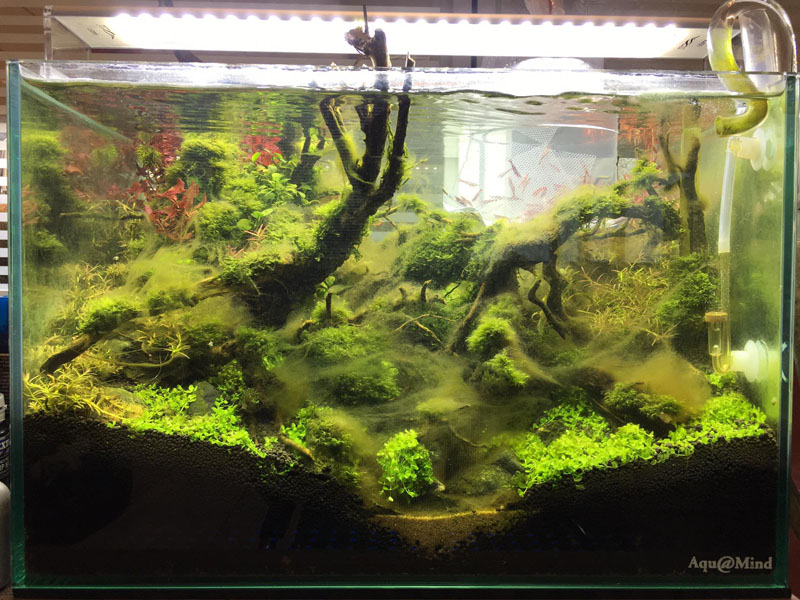
I left the tank unattended for 3 days and found this condition when I got back. If you asked me if I am surprised..perhaps a little but I also knew it would be like this. That’s because I pushed the lights, CO2, and fertilizers to the max. Good thing I am well prepared so I showed up with my army and ready for war. Let’s see how many days before the tank returns to its pristine condition.
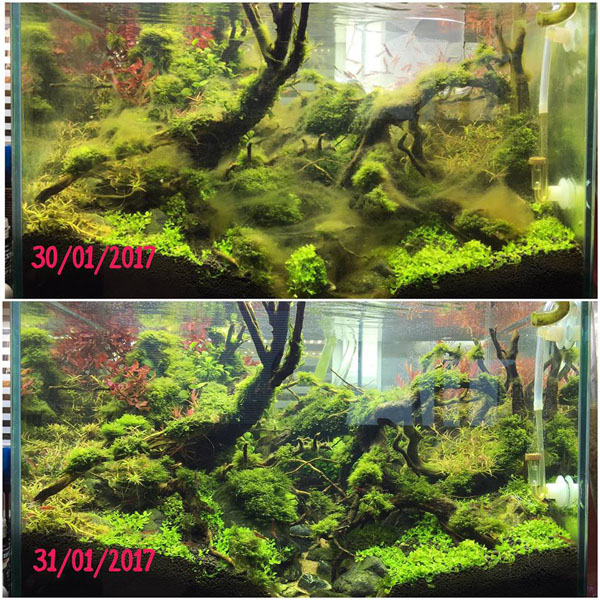
Yesterday vs. Today. What I did roughly was such the algae out, added some cherry shrimps, then do a 70% water change.

The hard jagged appearance of the rocks are now soften by the pearl grass which grew to cover the sharp edges.
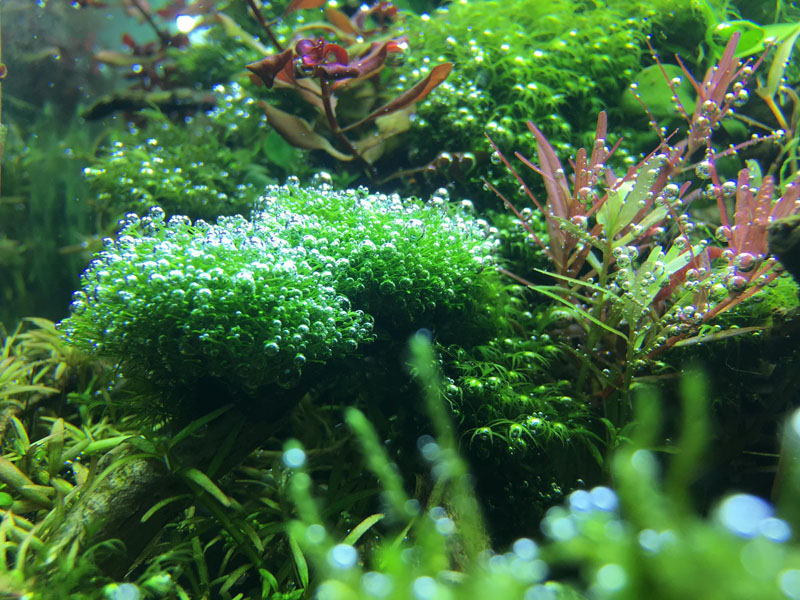
Pearling like soda.